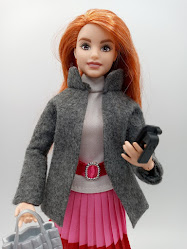
This isn't a difficult project but it does take a couple hours.
These instructions are for a girl elf but I don't think you'd have a hard time making clothes for a boy.
These instructions are for a girl elf but I don't think you'd have a hard time making clothes for a boy.

Earl only asks one question,
If Santa sends these elves to watch the kid's behavior...

Who monitors theirs???
On to the tutorial:
You will need:
wire cutters-or something to cut the chenille
One piece bump chenille-the color you want for legs/feet
One straight chenille-the color you want for arms
One straight chenille-for the torso, color doesn't matter
One 1" wooden bead-for head, or you could make the head out of felt
felt-colors you want for clothes
glue or thread-for clothes
something for hair-either paint, felt, yarn, etc.
trim, beads and sequins for decorations-optional
- Using three bumps of the chenille, fold the second bump in half creating the legs. Leave the long straight pieces under the two bottom bumps so they can be curled for tips of elf shoes.
- Cut the chenille for arms in half, you'll use one 6" piece.
- Fold the torso pipe cleaner in half, then bend each side in half again. I used the metallic one because it seems a little stiffer to me?

- Pull legs down through the center of torso.

- Weave arms through torso.

- Twist the torso so the legs and arms are secure. I also wrapped the arms around the torso once.

- If you're adding beads to the legs, slip them onto the chenille now. I added three yellow rondelles to each leg for a little bling and to look like stockings (I changed them to red later on).
- Lay the elf on top of the wrong side of felt and trace around the body for a dress. I gave myself at least 1/4" on each side the arms and I wanted a little turtle neck. Cut two. I would make the skirt a little longer next time.

- Glue or sew the fabric together. Note: I had some green mesh so I gathered it and added a little under her skirt, it was trimmed shorter later.

- Bend bump in half on each leg to make elf shoes (my favorite part-so cute:@). Round the skinny tip up to form a curl. Add bead or mini bell to end if desired.

- Draw a hat on the felt (like you drew on the dress), making sure it will be wide enough to slip over the elf's head. Cut 2 and either glue or sew together. Add bell, bead or pom-pom to end if desired.
- I decided my hair would be gold eyelash yarn, so I chained 12 with an I hook.

- Glue head onto body, glue hat onto head and glue the hair over the end of the hat. Or... If you are painting on your face and hair, paint it before you add the hat. If you're using felt or some other material for hair glue that on before the hat.

- Add any facial features you'd like. I'm not sure I'm going to, kinda like her as is...
- Curl the ends of the arms up to create hands.
- Name your elf and smile:@)
Have a happy day!
I'm Joining:
Tutorials, Tips and Tidbits
Wildly Original Linky Party
Kitchen Fun and Crafty Friday
Link Party Palooza
Link Your Stuff
Seasonal Sunday
Craftastic Monday
Monday Funday
Mix It Up Monday
Craft-O-Maniac Monday
Sunday Showcase
From Dream To Reality
Christmas Wonderful Linky Party
All Things Christmas DIY
Ornament Exchange