Showing posts with label knitting. Show all posts

Saturday, December 3, 2022

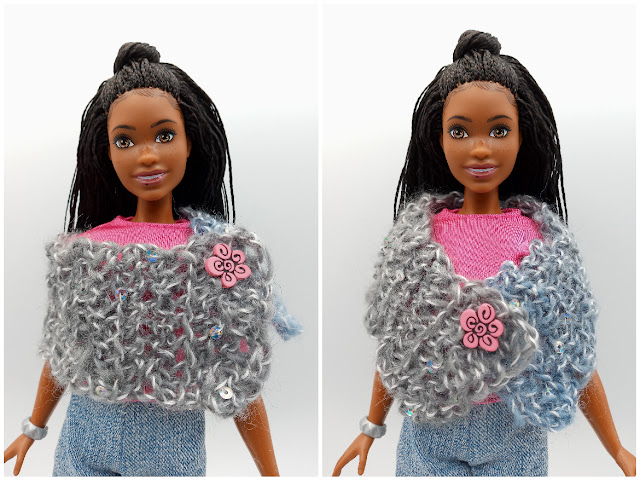
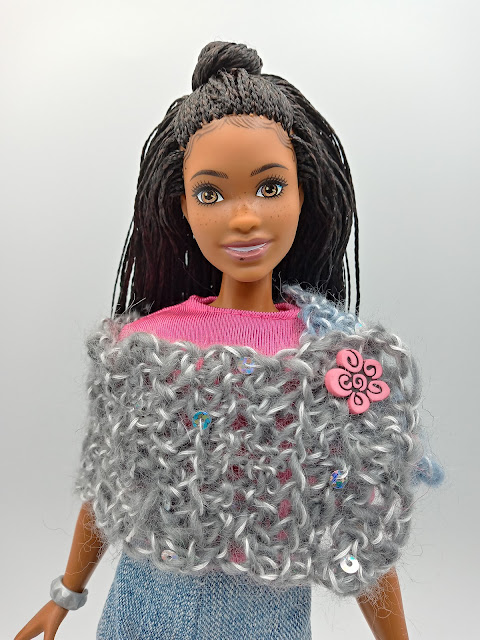
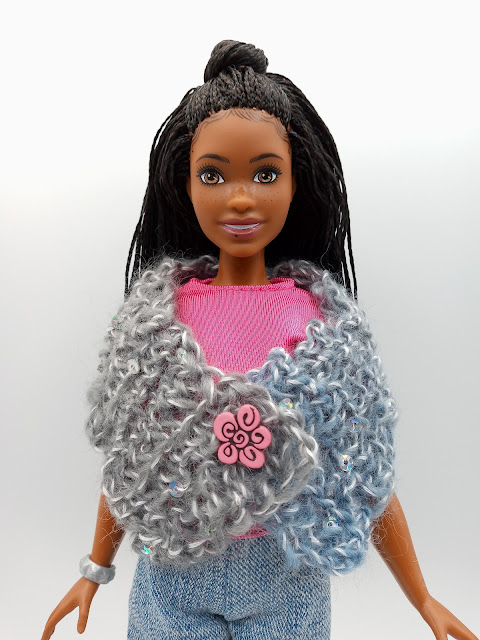
ReView: Cranberry Apple Jam & Barbie Outerwear Christmas Gifts-DIY

Leftover cranberries in the freezer? How about whipping up some Cranberry Apple Jam, I've provided a recipe that can be scaled down or up depending upon how much you'd like to make. And since cranberries have natural pectin, no store bought pectin is required! Just fruit and sugar, nice and easy... Add some warm spices and this would be a perfect Christmas gift:@) Good on toast or over cream cheese as an appetizer with crackers.

And as we're gathering gift ideas for the little Barbie enthusiasts in our life,
here are some cute DIY outerwear ideas that come together pretty quickly.
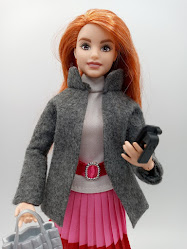
Mattel doesn't offer much cold weather gear...

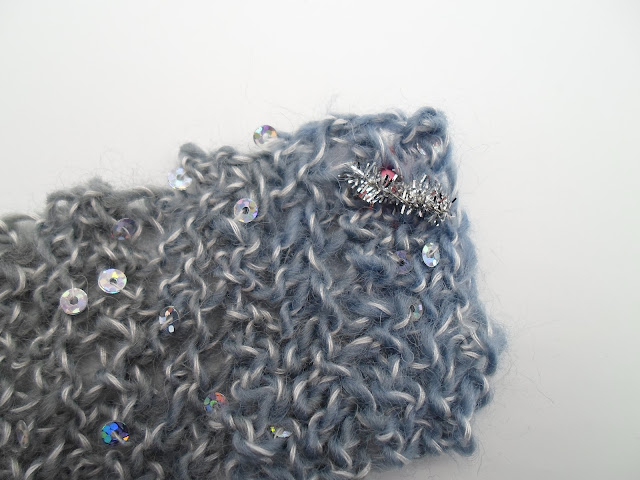
Vary the type of yarn used for different looks.


Happy Holiday Planning๐ŸŽ…

Saturday, February 5, 2022

ReView: Heart Shaped Food Round-Up & Easy Button Wrap for Barbie

As we're firming up ideas and plans for Valentine's Day I thought I'd share a post from 2017, a Heart Shaped Food Round-Up. It shows several simple ideas to help turn every day food into something just a tad more special for the holiday. Main dish, side dish and dessert, there's a little something for everyone:@)

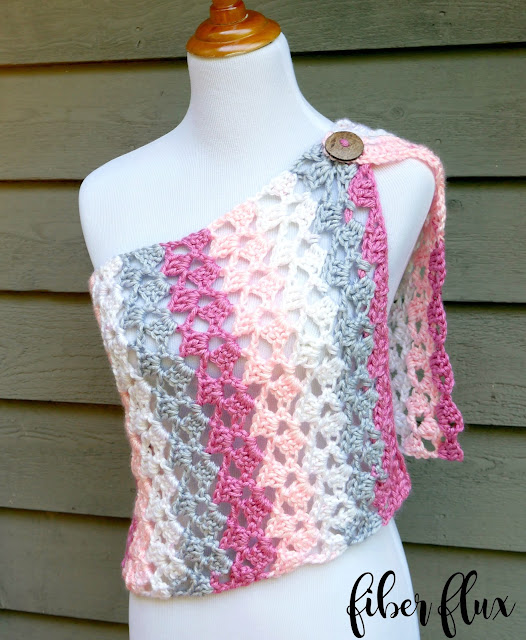
I'm always searching for blog inspiration and as soon as I saw a beautiful crochet wrap with decorative button, I knew it would be a fun Barbie project. Use your craft of choice, crochet or knitting, and I might knit one and update pics if Philadelphia gets another snowy day:@)  This is a great beginner's crochet project. I love that it calls for so few stitches in each row, kids will see progress quickly, encouraging them to continue. This simple wrap can be worn a couple ways, draped low off of one shoulder, or draped over both shoulders. And I'm sure young fashionistas will come up with some of their own ideas... 

I chained 10 for this particular wrap.
I suggest at least 12 for a bit more length. 

I've said it before folks... I am ~not~ a student of the fiber arts. I'm more of a "one-two-three-oh look, a shiny sequin" kind of person...
My goal is to simply share an idea that you can make for, or better yet ~with~ your girl. Make it yours, if you know how to crochet or knit a fancy stitch, have fun with it๐Ÿ˜Ž

One tip: I knew sewing a button onto this loose stitch would be a problem, so I chose to push a pipe cleaner through the button hole instead. Then just folded the ends over toward the middle. Just gives it a little more surface area to hold the button on.

My gorgeous inspiration:

✂What I did:
Extra thin (string type) yarn
J hook
Chain 12 or as many as desired for length from shoulder to hip.
Double crochet, or use any fancy stitch, for width. Use doll as guide, wrapping garment around her until it fits to your liking.
Sew button on, dress doll and smile๐Ÿ˜Š

๐Ÿ’—Make something just for fun and have a happy weekend:@)

Tuesday, October 12, 2021

Recycled No-Sew Scarf with Pockets for Barbie, Ken (or Any Doll)

We all like to feel cozy and warm, and when we can do it stylishly, with a quick craft... Well, that's just the icing on the cake:@) These Doll Pocket Scarves can be made any way you'd like, I chose a no-sew project made from a recycled sweatshirt. Other options are knit, crochet or use some thin felt or pajama material. Be sure to make it long enough to wrap around the doll's neck, and then hang down to a comfortable length at the sides to slip hands into the pockets. How wide should we make it? As wide as you'd like. And Barbie says, fashion alert: Super chunky over sized scarves are in this year!
Yep, I just had to buy a Pig In Mud t-shirt from Kosmo Kouture:@)

What I did:
Using recycled well-worn sweatshirt, cut 18" long for Barbie, 19" for Ken, by 1 1/2" wide strip of fabric.
Fold both ends up about 1 1/2". Glue both sides creating pockets. Hot glue worked well.
Option: Because I'm... me... I just had to add a team logo:@)
I glued the logo on with Liquid Stitch.

Embellish Barbie's with sewing trim, ruffle, yarn fringe, etc.
Tip: Glue the pockets so the smooth side is outside, it's easier to add embellishments.
Simply increase the size for larger dolls.

Let's gear up for the cooler weather and have a happy day:@)

I'm Joining:

Saturday, January 23, 2021

Saturday ReView: Hearty Goulash and Knit or Crochet Barbie Cowls-Free Patterns

What I love about this Barbie Fringed Cowl the most is, it's a great starting point... Want it longer and to drape more? Add more stitches and rows. Want the fringe thicker? Add two strands of yarn to each bottom hole. Want to add beads or knot the yarn in the fringe? Yep, that would be fun too! This is a great project to help a girl learn to knit or crochet, and I'm sure she'll want a few in different colors for her doll!

What I did:
Size 10 knitting needles and baby or sport weight yarn
Cast on 20
Garter stitch 8 rows (all knit stitch)
Bind off
Closure choices: You can tie two pieces of yarn to the top corners so it can be tied behind the doll's back, sew on a snap, or (my favorite) glue a very small piece of velcro to each side of the top corners.


Fringe: Use the bound off edge close to the neck, it will be shorter.
Cut 3"-5" pieces of yarn. Poke small crochet hook through the back of the lowest loop of the cowl. Fold yarn in half, grab center and gently pull it through the loop. Hook the two loose ends of yarn and guide them through the hole of yarn on the crochet hook. Gently snug up to the bottom of the cowl (the idea is, you don't want to stretch that bottom loop of the knitting). Trim the fringe to the desired length, I left mine pretty long.

Barbie says,
she's feeling rather... groovy!
And I think one in a rainbow of colors would really be cool๐Ÿ˜Ž

And I chose a different yarn and dug out a crochet hook... This time I decided to give it a little extra embellishment by adding some beads to the bottom. You'll be able to whip the cowl up in 15 minutes, the fringe will take a little time. And if you opt to add the beads, well, plan on a couple hour project just to give yourself time to finish. 

A pic of the cowls, knit and crochet side by side:
Disclaimer: Folks, I am ~not~ a student of the yarn arts... I've never been able to follow a pattern and just wing everything I do. The few stitches I did know, well, it's usually so long between the times I pick up a hook or needles... I forget them! So, please just try to use my instructions as a guideline, and if you have any helpful tips for others, feel free to leave them in the comments. Thanks.

What I did:
H hook, sport or baby weight yarn
Ch 20
Slip stitch together, be careful not to twist the chain.
Double crochet all the way around (I went into the top loop only).
Chain 3 at end and slip stitch into first loop.
Make one more round of double crochet.
Chain 3, slip stitch into first loop to complete the circle.


Fringe: 
Cut 5" pieces of yarn. 
My beads are 1/4" and I made sure the yarn would fit through the hole. I would aim for all of the beads being the same color next time. Those 'green' ones are not that bright in real life๐Ÿ˜•
I used a needle threader, poked it through the hole in the bead. Thread the yarn through the wire and pulled it through the bead.
Poke small crochet hook through the back of the lowest loop of the cowl. Grab one piece of yarn and pull through bottom loop of cowl. Keep bead to the side, go back up and grab both strings of yarn and pull through the hole of yarn on the crochet hook. Gently snug the bead up to the bottom of the cowl. Trim the fringe to the desired length, I made this one waist length.

A cute idea that I'm sure girls would love!

I started making this Goulash Recipe from Bobby Dean back in 2012 and it quickly became a family favorite. It's a nice recipe that has a little wiggle room, you can easily cut back on the sodium and meat, or add some whole wheat pasta if desired. Round it out with something green on the side (so you don't lose your mom card!), and you have a great meal for a cold winter day.

Have a great weekend everyone, stay warm:@)

Saturday, July 11, 2020

Saturday ReView: No-Sew Barbie Sundress & Zucchini Mock Crab Cakes

What I love about this easy Barbie dress is, while it's a no-sew pattern, it looks a little more finished because it uses the neckline hem from an old tank top. And since it's cut from a knit fabric, we don't need to hem the bottom. One pattern piece, one piece of fabric, and no limit to the fun ways it could be embellished and dressed up! Barbie says, warm sunshine, an Adirondack chair, and a lazy afternoon with a furry friend... Sounds good right about now.

The pattern, cut one:

I laid the pattern directly onto the front of the tank top,
matching the upper curve to the neckline (it doesn't have to be 100% exact).
Trace pattern onto fabric.
Cut out one piece.  

Even though these little velcro dots have sticky backs, I still hot glue them on. 
I just added one to each side of the top of the dress and left the bottom open (fabric overlaps). 
You can add more if desired.
These are from Dollar Tree, any velcro would work. 

Now, this is your dress, want to sew or glue some fun trim onto the bottom, that could be cute!

Here are links for two more tutorials for no-sew tops, a handkerchief top and swing top:

Cool, easy and breezy๐Ÿ˜‰
And if you make my DIY baby bump Barbie HERE
this dress is roomy enough for her too!

Way back in 2012 I made some Poor Man's Crab Cakes here using zucchini instead of crab meat. It sounded interesting and they were really good! Now, are they going to take the place of real crab cakes? Ah, no. I don't eat much seafood and even I like crab cakes!!! But, if you have some extra zukes to use up (and who doesn't in July and August:@), and are looking for a new side dish, this is a fun recipe to try. It's also different and something to get folks talking at the dinner table.

Make something just for fun and have a happy weekend:@)

Tuesday, November 3, 2015

Crafty Christmas-getting an early start on handcrafted gifts

I'm really not trying to freak anyone out (really, I'm not :@), just trying to provide a few Handcrafted Christmas Gift Ideas that don't take a whole lot of time and are easy to get started on now. What I love about most of these items is, they can be made in year-round colors or holiday colors and a couple are great anytime hostess gifts. So if you're planning on doing some crafting for Christmas this year, I hope you find a little inspiration here!

I think it would be great to give a nice thick wide coaster with a bottle of wine! You could make the colors match their decor, the holidays, or... dare I say, their favorite team:@) A set of 4-6 thirsty, washable coasters for glasses would be a nice gift too. 
And this pattern was written up as a hot pad if you need a Thanksgiving hostess gift idea.

While these ornaments may seem involved, I promise that once you get started it will click.
The best thing about them is, the focal point in the middle can be anything, just pick a favorite theme, cartoon character, sports team HERE, anything. They're a good stash buster too.
I've provided a link to a great tutorial.

What I love about this idea is, it's a fun gift for younger folks and pretty guy friendly too, minus the flower button of course:@)
It's a great use for old or thrifted jeans, super simple to make and just cute!

What can I say, if you have little girls in your life you probably have Barbie too.
This pattern is pretty easy and fun to make. Even a novice like me can whip up a sweater in a few hours. 

A great craft the kids can help make. This is a special gift if you include the background story too.

My crochet "skills" are marginal at best but even I can whip up these useful and pretty dishcloths in a couple hours. 
They are usually pretty well received too.

and last but not least...
Remember, the elf comes to live with you the day after Thanksgiving, 
so if you want to start this tradition with the kids or grands you'll need to have an elf ready this month. 
(That's Elfina riding in on Earl yelling "the holidays are coming, the holidays are coming!!!)

You can click my Craft Index for more ideas.

Happy holiday crafting everyone:@)

I'm Joining:

Wednesday, December 17, 2014

Crochet Infinity Scarf for Barbie

We all know girls like to accessorize and Barbie is no different! Actually, isn't she the ultimate diva??? This Infinity Scarf for Barbie literally takes minutes to crochet and I think a few in different colors would make a great little gift or stocking stuffer. This is even easy enough that older girls could make their own. And of course this idea would be fun for American Girl dolls too.

 It was a bright morning for pics... But I think you get the idea:@) 
Thinner yarns work better but don't hesitate to use what you have. And if you happened to make a scarf for your daughter or granddaughter, how fun to make a matching one for her doll! If the yarn is 3 or 4 ply, and if you have the patience, you might want to separate it into two strands to better match the scale of the doll. The good news is, you only need a couple yards:@)

Infinity Scarf for Barbie
  1. Chain as many as needed to make it at least 10" long.
  2. Use any crochet stitch you'd like, chaining two and turning at the ends. Repeat until it reaches a width you like (approx 1/2"). 
  3. Sew or single crochet the ends together to make a circle and weave in your strings.
Other last minute crochet/knit Barbie clothes ideas:


Have a happy day:@)

I'm Joining:
Wildly Original Linky Party

Saturday, February 15, 2014

Knit Outerwear Vests for Barbie-Down or Faux Fur Styles

Well folks, it looks like winter will be here for a while longer, so let's get comfy... These Knit Barbie Outerwear Vests whip up in no time and I've made a "down" version with worsted weight yarn (the garter stitch kinda reminds me of a puffy Lands End vest) and a "faux fur" (faux wool?) one with crazy yarn from the $1 bin at AC Moore. This is another project a girl can most likely make for herself. They are simply constructed from a square for the back and a long rectangle that wraps around the doll's neck-creating a collar and the front panels, then gets sewn to the sides, leaving a hole for each arm.
Pin It
Now, I will say this crazy fuzzy yarn can be a bit challenging to work with. I prefer knitting with it because it's a little easier to see the stitches when they're on the needles. If I was more comfortable crocheting with it I'd love to try one of my Bear Skin Rugs:@)

And here's an updated version using the fun fuzzy sparkle yarn from Dollar Tree:

I love this project for a few reasons:
  1. They are cute and fashionable and I think they'd appeal to most girls.
  2. Mattel doesn't mass market a lot of outerwear for Barbie.
  3. Different yarns will give you different looks.
  4. It's a perfect little project to help teach your girl to learn to knit.
  5. And you can quickly whip a few up if you're looking for a little extra gift for the holidays. An experienced knitter can probably get one done in about an hour or so. And as you'll see below... The schematic was designed for real people, maybe make one for your girl ~and~ a matching one for her doll.
  6. I'm sure if you prefer to crochet you can figure out how to make one by looking at the schematic below, I haven't tried it yet. Or I have a crochet pattern for a poncho here.
The best part about this vest is, the pattern was designed for real women! So if you'll stop by Laylock you can see the beautiful vest she made and get all her tips and instructions. I sincerely thank her for this great schematic that makes this pattern as easy as pie:@)

Knit Outerwear Barbie Vest-Faux Down or Faux Fur-adapted from Coze: Easy Knit Vest Pattern
10MM needles, worsted weight or fuzzy yarn, all garter stitch.
Back: cast on 10, knit stitch until it reaches just under where Barbie's shoulder meets her arm. Approx 14 rows. Bind off.
Sides: cast on 7, knit stitch until it reaches from the bottom of the back, wraps around the back of her neck, and down the other side to the bottom of the back. (Wrap it around her neck like a scarf.) Bind off.
Finish: Sew sides to the back (up approx 1" from bottom of vest) leaving an opening big enough for an arm on each side. Then center the collar and sew it to the back all the way across the top of the square.
Note: If you use a thinner yarn you'll be able to fold the collar down like Laylock did, this thick/fuzzy yarn is too bulky for that.