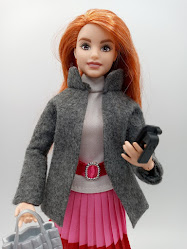
Basic Guideline Instructions: Adapted from an ornament by justcraftyenough
- Cast on 18
- Stockinette stitch (knit one row, purl the next, repeat) until it reaches under her arms (approx 14-16 rows).
- Cast on 16 stitches (arm).
- At end of next row cast on 16 more stitches (second arm)
- Work another 4-6 rows for half of sleeve, when it's just about wide enough:
- 21 stitches, bind off 8, finish row.
- 21 stitches, cast on 8, finish row.
- Add another 4-6 rows for other half of sleeve.
- Note: one sleeve will have one extra row, that's the one you'll want to bind off first.
- When sleeves are wide enough bind off 16 from the wider sleeve and stitch across.
- Bind off 16 from second sleeve and stitch across.
- Finish the body of the sweater, bind off, cut yarn and knot.
- With right sides touching, sew sides together. Sew in tails and turn right side out.
How about adding a cute shirt extender by using a little ruffle under the sweater-cute! My ruffle was approximately 2 1/4" wide, and I only needed about 4" in length. The back can be secured with a tab of velcro, a snap, or simply use a little tape that will get covered by the shirt. And of course you could sew any fabric you'd like into a 'slip' with elastic at the waist. These extenders can be cut to size for standard or curvy Barbie, simply wrap around the doll's waist for fit.

The white cotton ruffle is more solid,
the black one is lacier and lighter.

These shirt extenders work well with less bulky pants,
luckily there seems to be no shortage of yoga pants or leggins for Barbie these days...
✂Make something just for fun and have a happy day:@)