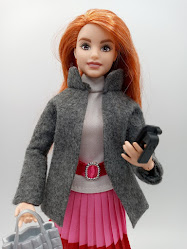
I thought it turned out neat:@)
A close up of the yarn. The pictures with the doll are closer to the true colors.
(Why'd AC Moore get rid of those $1 yarns? I just stopped there, they're back in stock-WooHoo!)
(
I'll provide some general directions, but I just winged this folks.
Notes:
- You can use an H or I hook. I used H and might try I for this fuzzy yarn the next time.
- Body and head are worked in the round, try to keep your stitches loose.
- The fuzzier/crazier the yarn the more forgiving. You're just aiming for a large oval for the body that lays flat. You might need to 2DC in each stitch (especially around the ends) to make that work instead of every other one, just see how it's working out.
- I decided to make the head separately because I wanted to stuff it. Eyes and nose optional... We want a fun accessory, we don't want to have to pay for therapy:@)
- The legs get crocheted on separately too.
- I Googled 'bear skin rug with head' to have something to look at as a guide.
- As for the size, it's this city girl's understanding that bears can get kinda... big. Just make it to the scale you like. My body (neck to tail) ended up approx 8"x 5.5" and it's 11" overall.
Bear Skin Rug for Barbie
- BODY:
- Ch 8
- DC in second hole from hook and all the way across, 3 DC in last hole.
- DC, 2DC every other hole down the other side (you just want it to lay flat), 3 DC in last hole.
- Continue to alternate DC, 2DC in the round, with 2DC all around the curve of the ends, until you make it as big as you'd like it for the body. But...
- Before you get to the last three holes in the center of the edge switch to TC. 2TC in each of the last three holes, then SC in next hole. This will make the tail. Cut the yarn and knot it.
- HEAD:
- Ch2
- SC 2nd hole from hook twice. Keep SC until you begin to get a round cone.
- Once a cone, start 2SC in each hole, this begins to make the muzzle/snout. Continue 2SC until it's approx 1/3 the length you want the head.
- DC around.
- 2DC in each space around, at this point your head is most likely wide enough.
- SC in about every 3rd hole. Before the opening closes up, add a cotton ball or very small amount of batting. Cut the yarn and knot it. Note: I decided between the crazy yarn and bumpy texture from the DC my head gave enough of the illusion of ears. You can add two ears to the top of your head if desired.
- ARMS/LEGS:
- Attach yarn to spots that look right, SC 5, *Ch2, DC in same space as Ch2 then across 3 holes, turn. Repeat from *. Make arms and legs as long as you'd like but when you get to the last row skip a space before the first DC and do one more DC then one SC. Cut the yarn and knot it.
- Sew head on. Weave in ends and let Barbie run her toes through her new rug!
The one piece knit sweater pattern is HERE.


