Showing posts with label Barbie jewelry. Show all posts

Tuesday, April 9, 2024

How to Make a Beaded Barbie Necklace & Other Doll Jewelry

I know folks have been making Barbie jewelry for as long as... well, since 1959:@) But I wanted to share my favorite tip for creating an easy necklace for Barbie. You can use any smaller beads that are to scale and any wire (these necklaces were actually made with Christmas ornament hooks). Simply create a small loop on one end of the wire and add as many beads as you'd like. Then create another loop on the other end, but the key is to make sure the beads are tightly pushed up against each other. This allows the necklace to be shaped nicely into a circle or oval. Easy-peasy and pretty!

Other versions:
I made the floral necklace from a thrift store bag of kids beads. It was for my Hawaiian hula outfit, kind of a wink and nod to a lei. Ken says "aloha". And I've used the necklace to wrap around the neck of a Halter Top, pattern here.

A quick pic showing the little loops on the ends. True Jewelry makers and folks that sell things know how to make them tidy, tight little circles. In my world... So far Barbie hasn't complained😉

Dollar Tree baby bracelets make great Barbie necklaces. This is a fun idea for a girl's birthday party or sleepover craft. Simply glue or paint on embellishments.

Side note: The bracelets above also make a great bridal veil:

I've also painted plastic Mattel jewelry 
for a more grown-up look...


🌺Make something just for fun and 
Have a Happy Day!

Tuesday, October 10, 2023

Dollar Store Halloween Crafts for Barbie Round-Up #2

Back in 2021 I shared some Dollar Tree Halloween Crafts for Barbie, I thought I'd add another round-up just for fun. I hope it helps keep the kids busy for a while, or gives folks an idea or two for Halloween Party crafts or a sleep-over. But we'll start with a new easy, little project for this year... As soon as I saw these 11" bats I knew they'd make a quick Bat Person Halloween Costume. This would work for Ken, Barbie, or action figure dolls. And since Ken would never show up to a party empty handed... He brought a jar of Wool of Bat:@)

The bat I started with:
✂What I did:
  1. The mouth is open and the body is hollow. I cut the head off (gross, but this ~is~ Halloween:@) and then cut the underside of the body off. Trust me, you'll know exactly what I mean when you see the bat. 
  2. Then I pulled the elastic off, made that hole bigger by twisting the point of scissors into it, and added some ribbon. Tie ribbon around neck, wa-la we have bat wings. 
  3. For the pic, I sat the head on top as a hat. You'll want to add a glue dot, or hot glue some ribbon to the inside bottom, or run ribbon through two holes, to tie the hat on for more rigorous doll play. 
Crafts from necklaces:
Glue a little velcro on to each end for necklace closure (or use twisted pipe cleaner). I hot glued the necklace to some ribbon for the suspenders. And as you can see, simply twisted a pipe cleaner to make the belt. All super easy, and the kids can wear leftover necklaces too:@)

These little Recycled K-Cup Buckets couldn't be easier, the hardest part is emptying and washing the k-cups... How I made them here.

One of my favorite Barbie crafts is
There is no end to the ideas...

I have to chuckle, 
all items are still at Dollar Tree this year.

🎃Make something just for fun, and
Have a Happy Day:@)

Saturday, August 12, 2023

Fresh Tomato Salad with Lemon & Hair Bling for Barbie

My tomatoes are coming in now, and I'm guessing you might have a few extra too:@) You can find quite a few nice side dish, pickled items, or salsa type ideas on my Side Salad Pinterest Board. But I have to say this Fresh Tomato Salad with Lemon and Oregano was a favorite of mine, oh and did I mention there isn't any added sugar? Don't hesitate to give it a try folks!

Another good year:@)

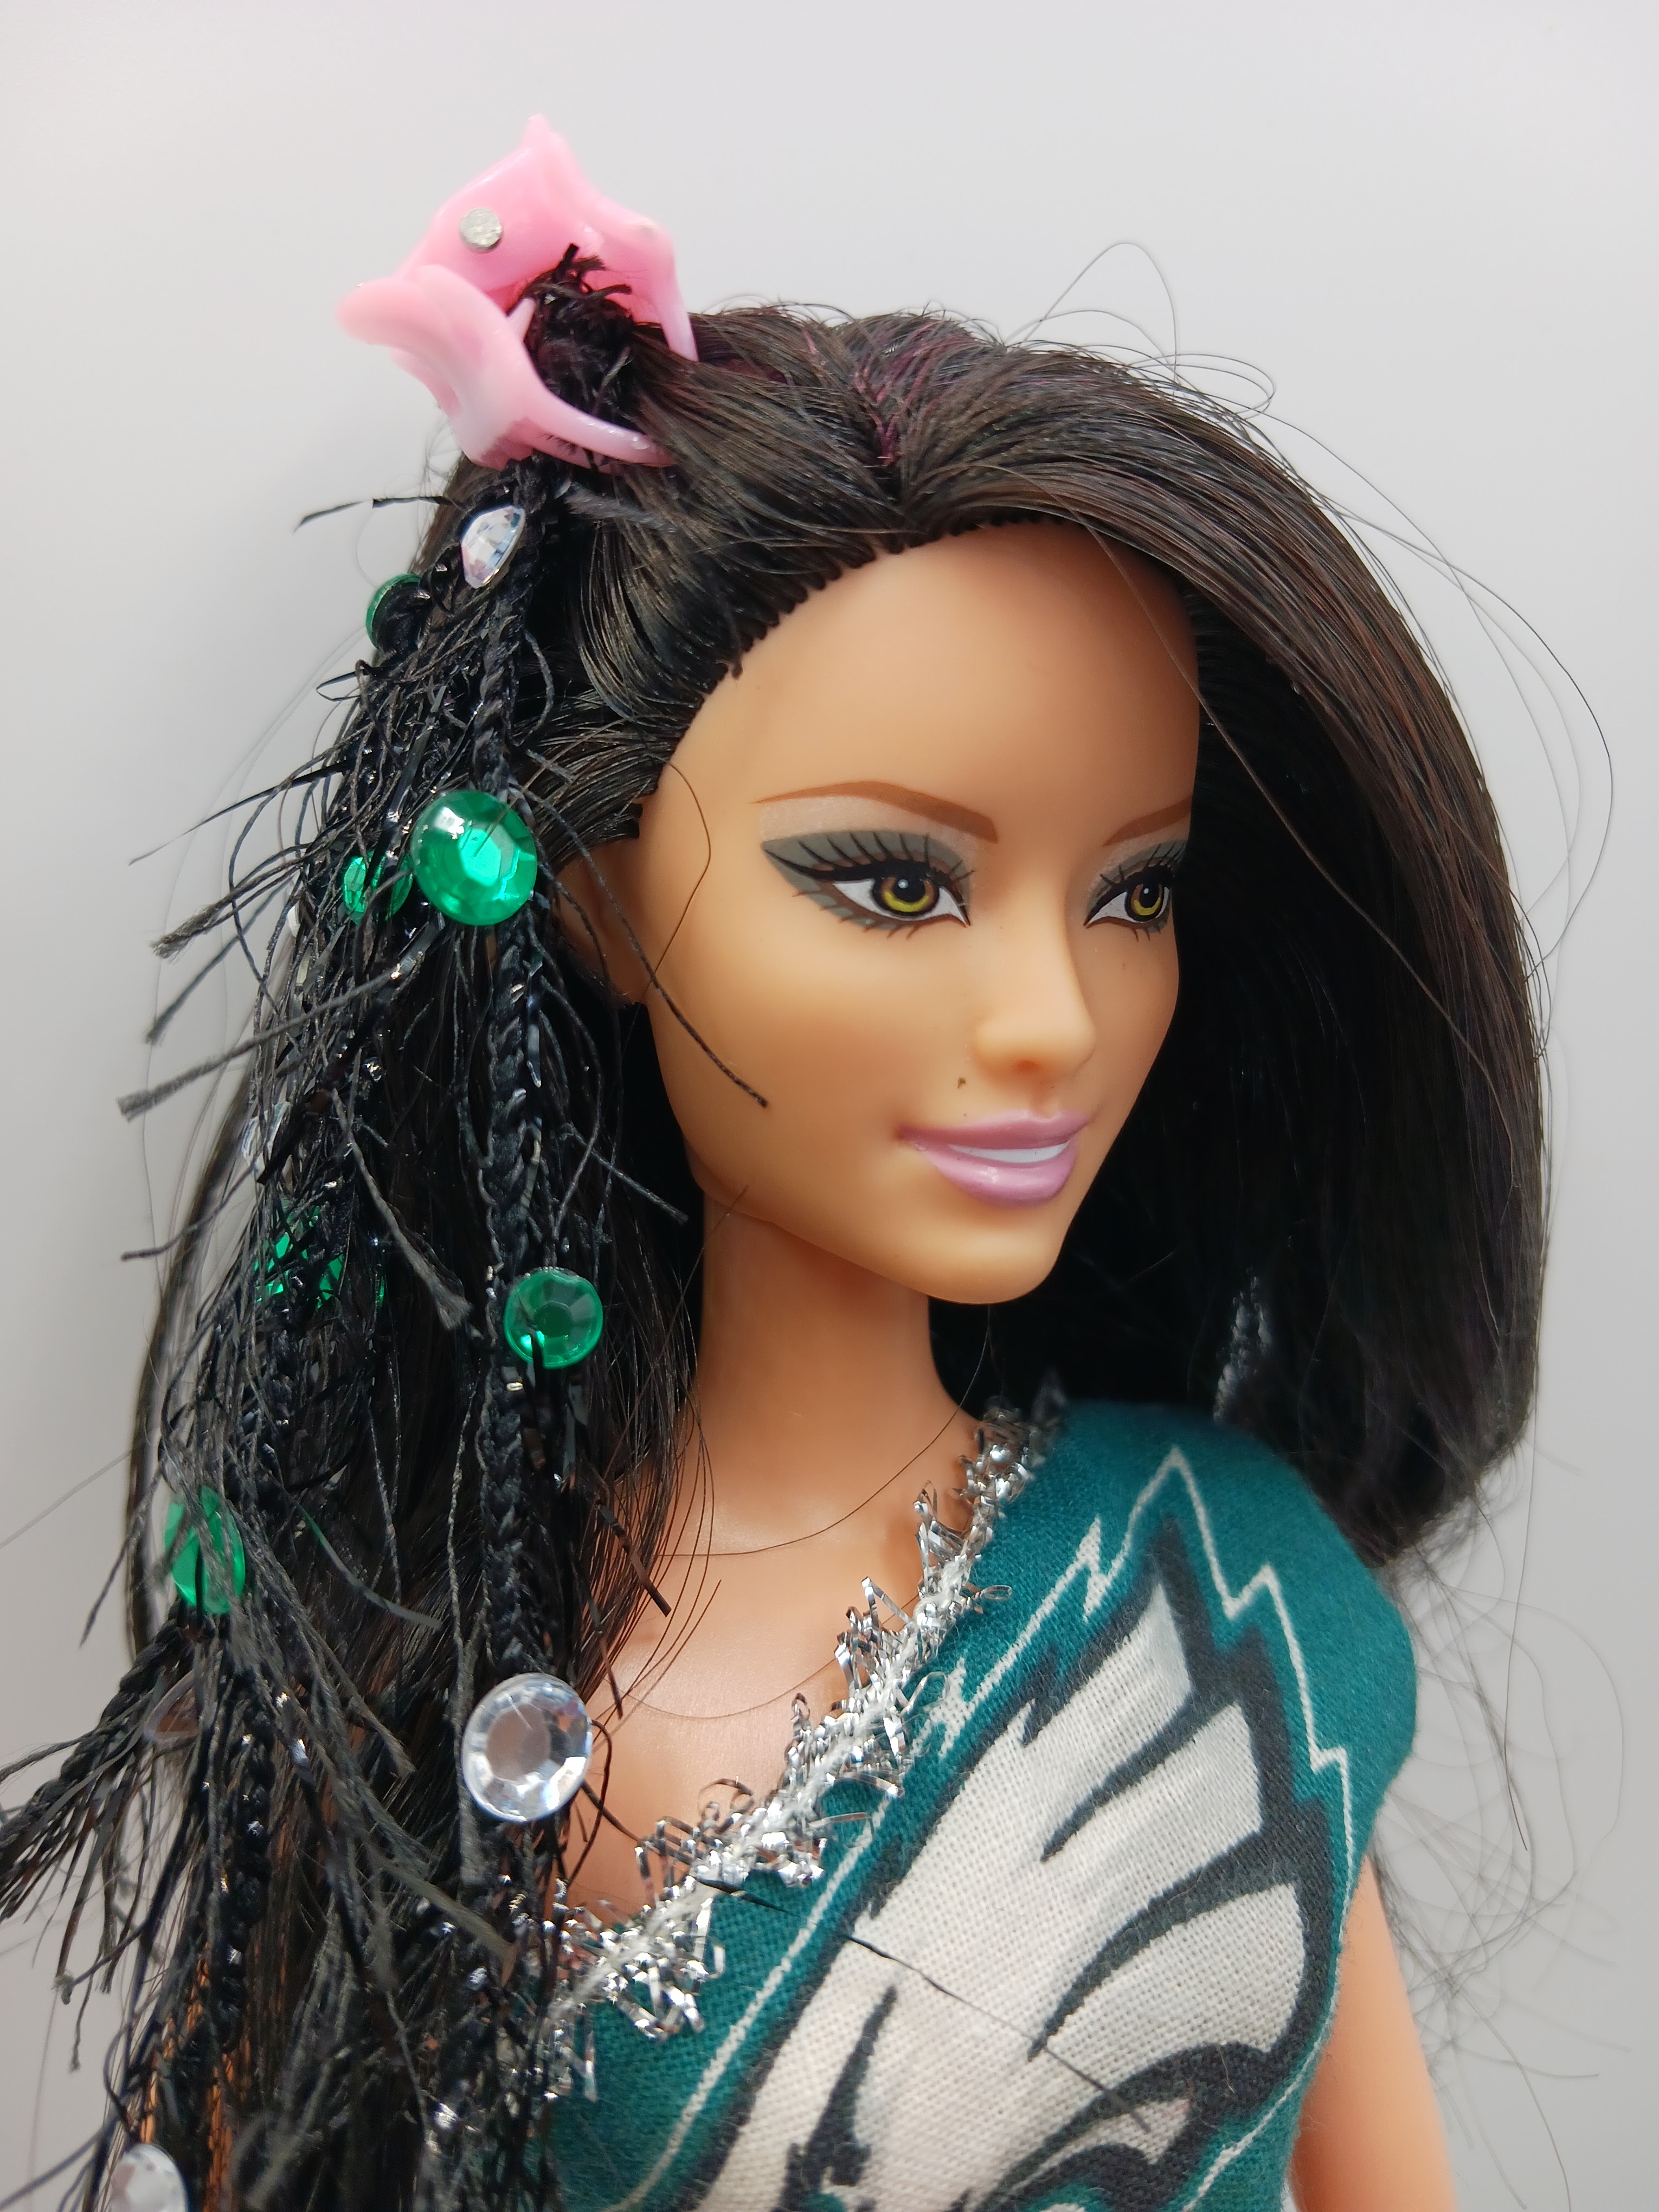
I saw a Blinger kit on QVC for adding rhinestones to hair and clothes. It was a small stamper that held a circle of gems, each one had an adhesive backing, as you pressed the unit closed it added a little bling to hair. They also suggested it could be used on dolls. So that got me thinking... The idea sounds truly amazing for a kid, she could get fancy, and her doll could match:@) ~But~ as someone that uses glue dots a lot for pictures, I'm not a big fan of glue around doll hair. So we needed a shiny alternative. 

And we needed it quickly, Barbie says we're about to enter my her favorite season of the year... Football Season!!!

How about a simple clipped in hair extension, and the rhinestones stick to it, not your pretty doll hair😉 Use any kind of thin yarn, ribbon, cording, thick string, long tinsel, etc. and glue the gem to it. I happened to have some crazy eyelash yarn in my stash. I cut three pieces about as long as Barbie's hair. Made sure the crazy "strays" were all pointed down and tied them together on one end.

The clips are these inexpensive spring clips from Dollar Tree. I bought a pack of 30 in assorted colors. They are around a half inch long. I placed the knot inside the clip, pulled one side of the doll's hair back and clipped it in place.

Sticky back rhinestone gems can be found anywhere from Walmart to Dollar Tree to the craft stores. Just place them on the yarn as desired and press to stick. 

Wa-la, instant bling😎
And we're representing our team well...
Of course this would be great for any event, any season, any holiday, or just any ole day😊 Alternately, if you already have true hair extensions or braids, you could use them.

Barbie says, 
make something just for fun and...

🏈GO EAGLES!!!
Have a Happy Day:@)

Friday, August 31, 2018

Happy Labor Day Weekend-Barbie Size Piggie Corn on the Cob Holders, Blingy Earring Top & DIY Tray

If you nose around Ebay long enough... You can find almost anything. Even things you'd never guess were out there. Like this Corn on the Cob for Barbie with ~PIG~ holders! Yep, too silly to pass up, had to get it:@) If you're one of my sons insert eye roll here... Ack, I love it.
Buttons also make great 1:6 scale food props: 
Grapes and fish on grill are buttons.

Barbie says it's entertaining season folks, with football parties, big family dinners and the holidays coming up, this Serving Tray from the Bottom of a Shampoo Bottle is a super simple ~free~ way to add a platter to your doll's kitchen accessories.

And the whole serving tray project took all of about 10 minutes-I like that in a project:@)
Blingy Top from Headband and Dangle Earrings Directions:
  1. Wrap headband around the doll, covering her chest.
  2. Pinch together at the back. Cut the headband leaving an extra 1/4" on each side for a seam allowance. You'll have a piece of headband that's about 5" long and you can make two tops from one headband.
  3. Place right sides together, sew headband closed along cut edges, back-stitching top and bottom. This creates a tube top.
  4. Turn so right side is out.
  5. Slip top on doll to determine where to sew on earrings.
  6. Either gently bend earring to slip dangle off, or cut the earring to remove dangle. Be careful and watch that sequin on top, it's not attached and will fall off.
  7. Hand sew earrings to top.
  8. Slip top on doll, decide what bottoms she should wear and admire your blingly new outfit!
What I did for tray:
I started with an empty shampoo bottle:

Cut the bottom off and washed it well:

 Then trimmed it as neatly and evenly as possible. I used these cutters:
If you don't have a pair they really come in handy!

I wish all of you a Happy Labor Day Weekend!
Don't know about you, but I might just toss a couple ears of corn on the grill:@)

Saturday, January 28, 2017

Beaded Heart Ornaments for Valentine's Day and Statement Necklace for Barbie

I've always been fond of bead work and would like to try to learn about it and do some this year. I found a good video tutorial and made a couple Beaded Heart Ornaments for my Valentine's tree. I think they turned out cute for my first attempts:@) The larger one used 10mm beads and is about 2" x 1.5". I wanted to do something different and added the XO beads (wish they were horizontal and closer to the top but it took four tries to get it like this-ugh).

If you can follow directions (which is always a challenge for me:@) you can whip these up in about 15 minutes!
Sparkly and pretty, they're a fun addition to my Valentines tree.

The smaller one also makes a great Statement Necklace for Barbie.
I think it looks very fancy, and elegant enough for any Valentine's dinner party or function! 
Or maybe even an Oscars party?
   
 I used 2mm beads and this heart is 1 1/2" wide. 
These cute hearts can be whipped up in about 15 minutes once you get the hang of it.
 The chunky over-sized necklace works perfectly with her strapless dress.
Now Barbie's ready to celebrate with a glass of champagne and maybe some chocolate candy.

Make something just for fun and have a great weekend:@)

Thursday, January 19, 2017

Valentine's Day Tiara for Barbie -DIY Tutorial

I found inspiration for this Queen of Hearts Valentine's Day Tiara for Barbie while perusing the isles of Dollar Tree. They had some really cool tiaras for Mardi Gras, which I totally need:@) This one couldn't be easier, it uses the bottom ring from a bottle with a screw on cap, some sparkly pipe cleaners and beads from your stash. A perfect cold winter day project to keep the girls busy, and Barbies everywhere happy!

I used the ring from a bottle of vinegar, any sturdy plastic ring would work.
The tiara before embellishing...

Directions: 
  1. Wrap a sparkly pipe cleaner tightly around the ring at least five times. Try to keep it close together and completely cover the ring.
  2. Add a few longer 'spikes' to the tiara in the center to give it some height.
  3. Finish the other side by wrapping the pipe cleaner the same amount of times as 1 above.
  4. Glue on beads, sequins or any desired embellishment. 
  5. Please note: The doubled pipe cleaner spikes will be too thick to push on most beads. You could cut small pieces of pipe cleaner and wrap them around the ring so that the two ends stick up (think V) and push beads onto the ends.
  6. Cut the ring in the back so it can be opened and placed on Barbie's head.

Wednesday, March 30, 2016

Opening Day of Baseball Phillies Logo (or Your Team) Tank Top for Barbie-Free Patterns

Is Barbie more excited about baseball or the promise of warmer weather? Hmmm... A grilled hot dog sounds pretty good right about now...

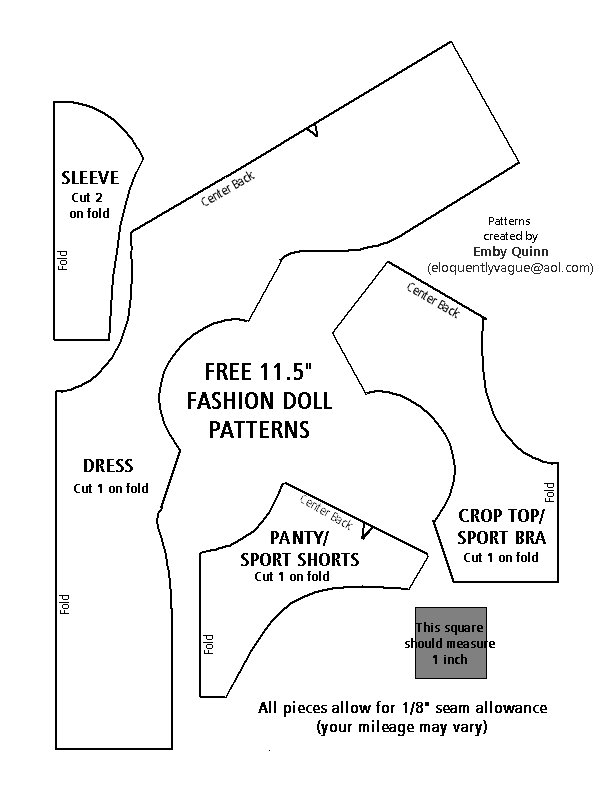
I didn't know there was a second sheet of free Barbie patterns from EmbyQuinn but I'm sure glad I found it, and I finally tracked down her instructions too:@) Different logo fabrics can be found at stores like JoAnn Fabric and mine was from Walmart years ago. This Team Logo Tank Top for Barbie is a variation of the cropped top on the pattern sheet. I didn't add the sleeves, increased the armhole hem and I added 1/2" to the length.
 If you're a seasoned sewer this would whip up in no time. I am not a seasoned sewer and spent less than an hour working on it. My back closure is Velcro. The only thing I'd do differently is sew the bottom hem after the sides are sewn together (yep, I didn't follow directions... again). Sewing order for tank top hems: Neck, arm holes, sides, back and then bottom.

Here's the pattern sheet, save it and use the scroll button on your mouse until the gray box is 1". 
Emby's directions for sewing can be found HERE. I can't wait to play with the dress next:@) Another pattern sheet with pants, skirt and shirt can be found HERE.

My best advice is go easy on yourself, these dinky clothes can be challenging and don't need to be perfect... Have you seen the quality of the doll clothes they're selling that are made in China? And they are working on them all day! 
Have fun, this is a labor of love:@)

I found these little purses in the party section at Walmart and immediately saw a cute sparkly backpack for Barbie. At 50¢ a piece this would be a fun craft project for a girls birthday party, sleepover... or rainy afternoon. The straps get hot glued on and could be made from hair bands, ribbon, elastic or even yarn. I cut two 4" long pieces of salvaged elastic that was about 1/4" wide and it laid nice and flat.

Barbie looks so cute and sporty headed to the game!

Once again the most time consuming part of this project is waiting for the hot glue gun to heat up.

The key is to glue the straps on at an angle (kind of meeting in the middle at the top) so they help hold the backpack up on Barbie's back without slipping back down her arms. I got sloppy with the glue... Here's hoping you or your girl can be a little neater. Just keeping it real folks😉

The purses I started with:
You can click here for my Barbie Pinterest Board.

Go team and have a happy day:@)

Saturday, March 26, 2016

Saturday Snippets-DIY Barbie Bling, Spring Planters and Happy Easter!

I'm always looking for inexpensive outfits and props for my Barbie photo shoots:@) Dollar Tree had some dolls and while they were what you might expect (Bad Hair Day Barbie??? And I'll try my hand at repainting her lips later), there were some very pleasant surprises too...

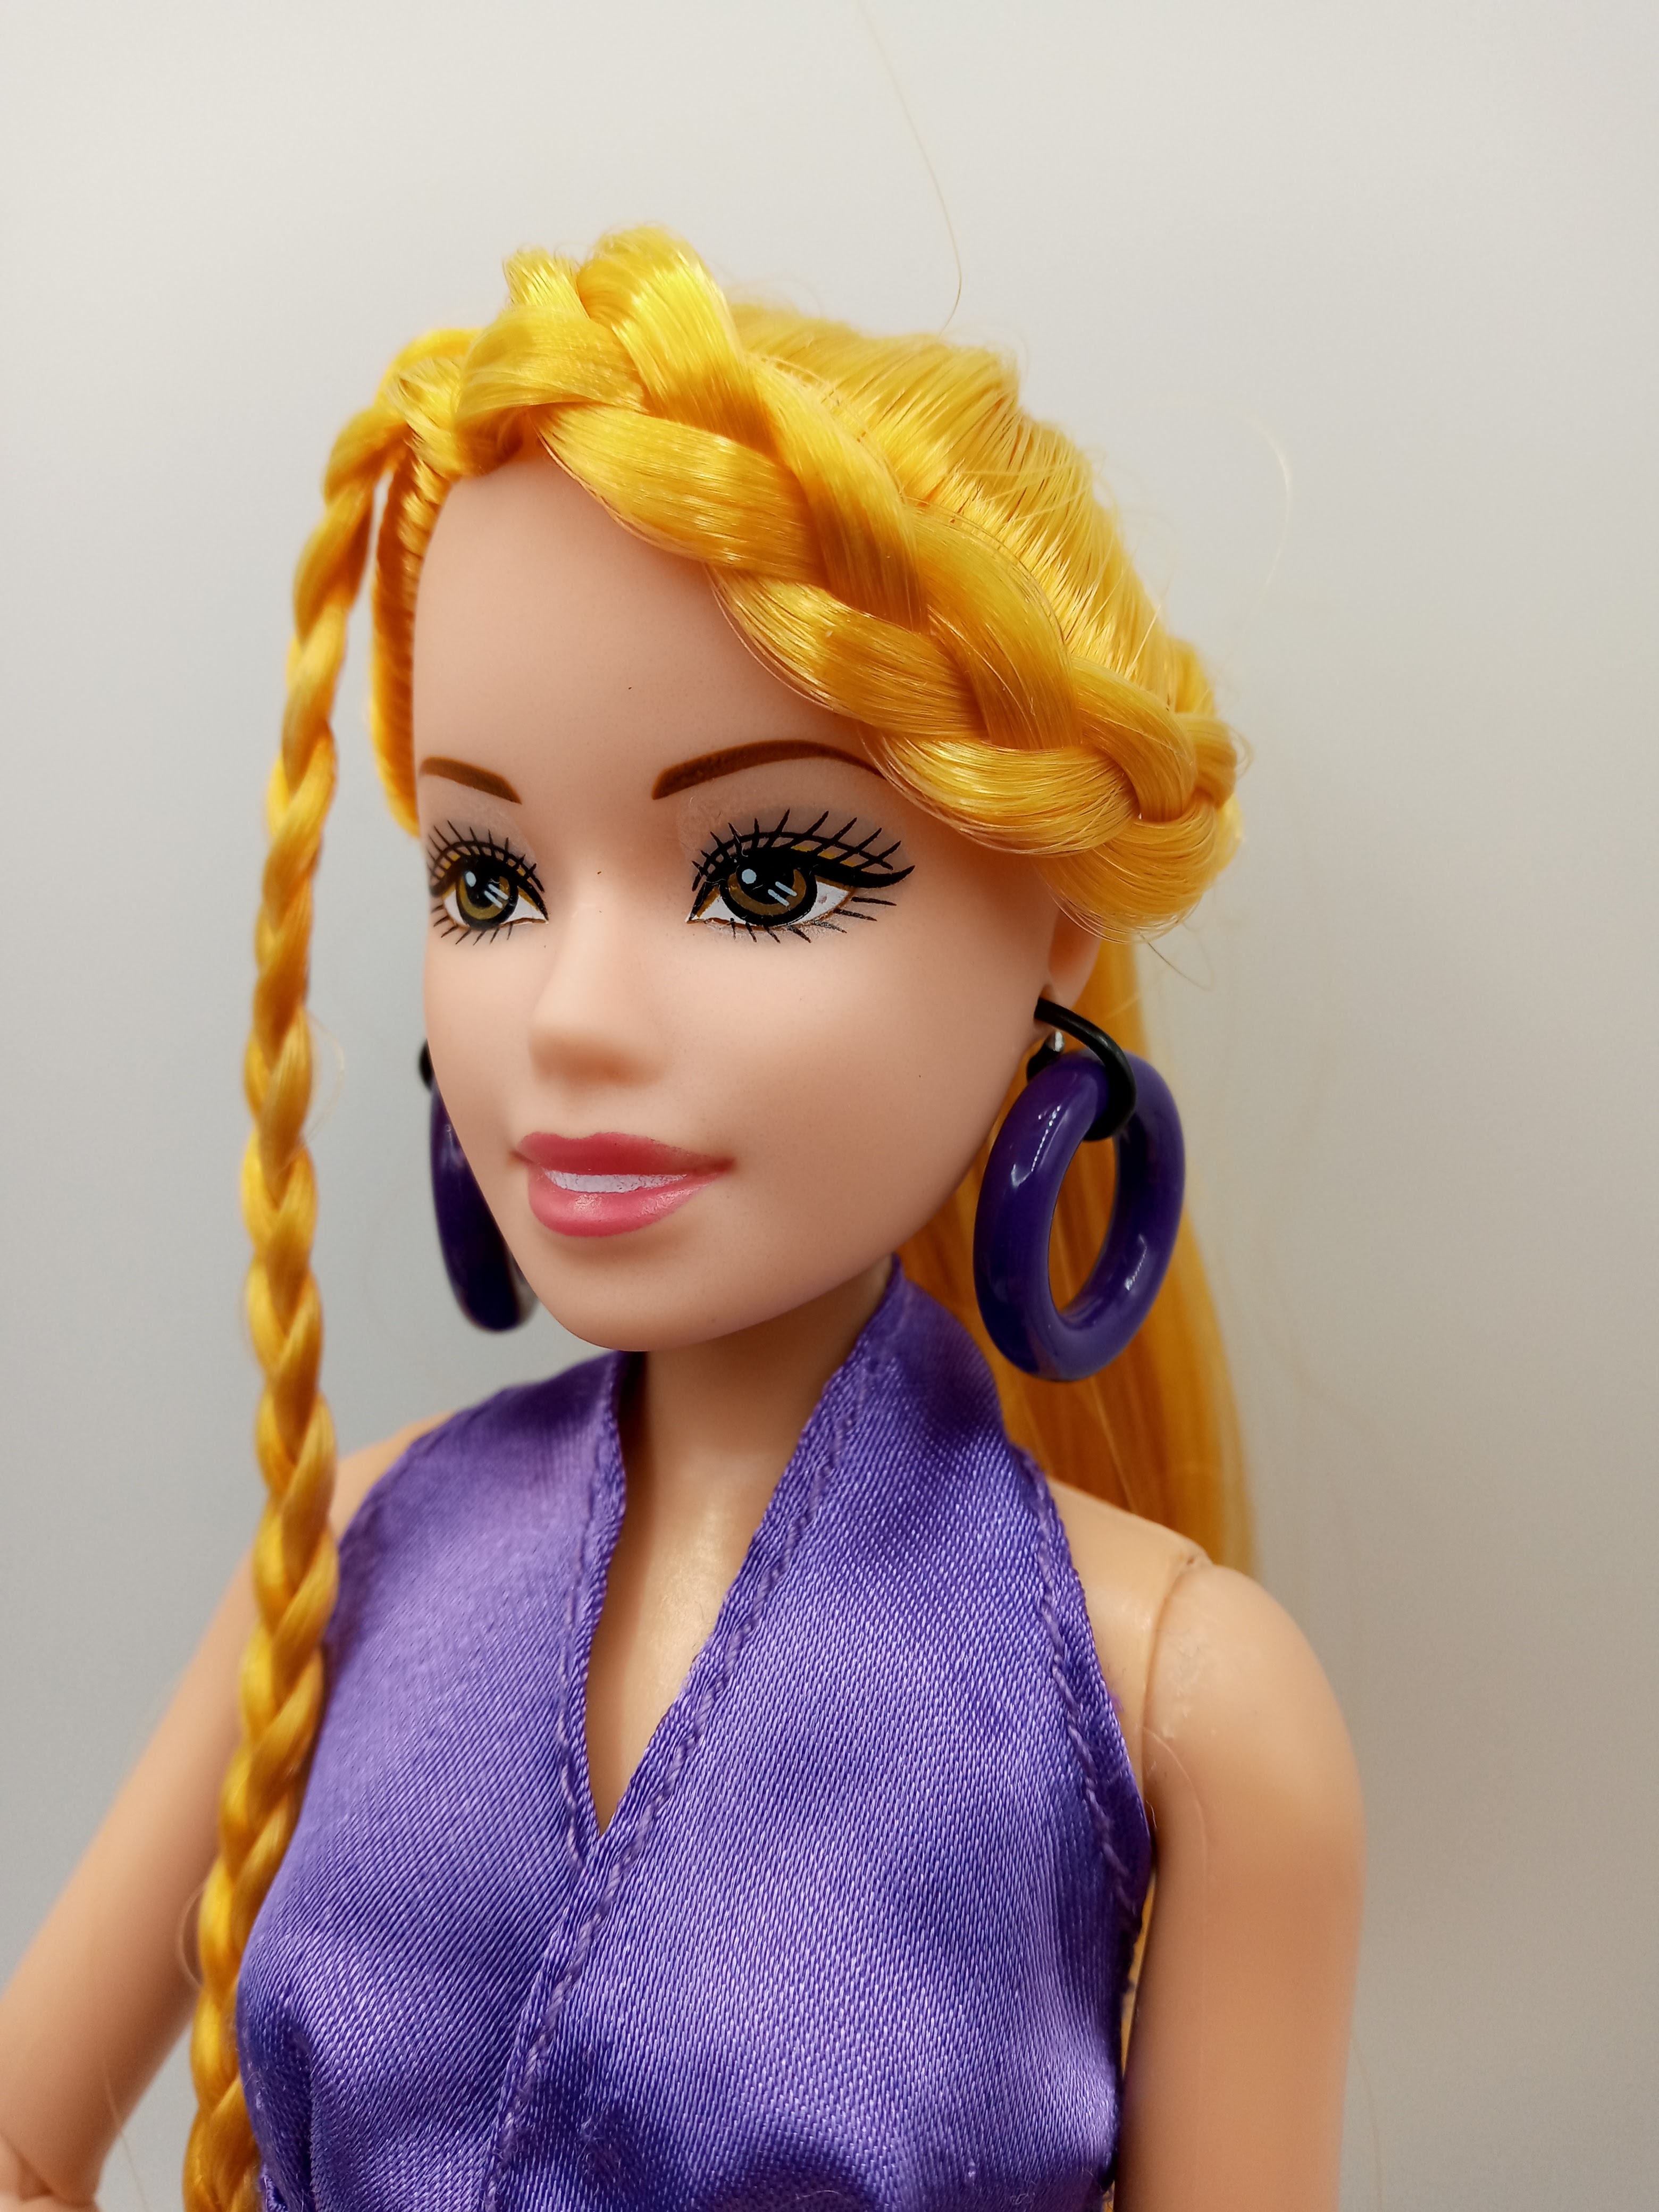
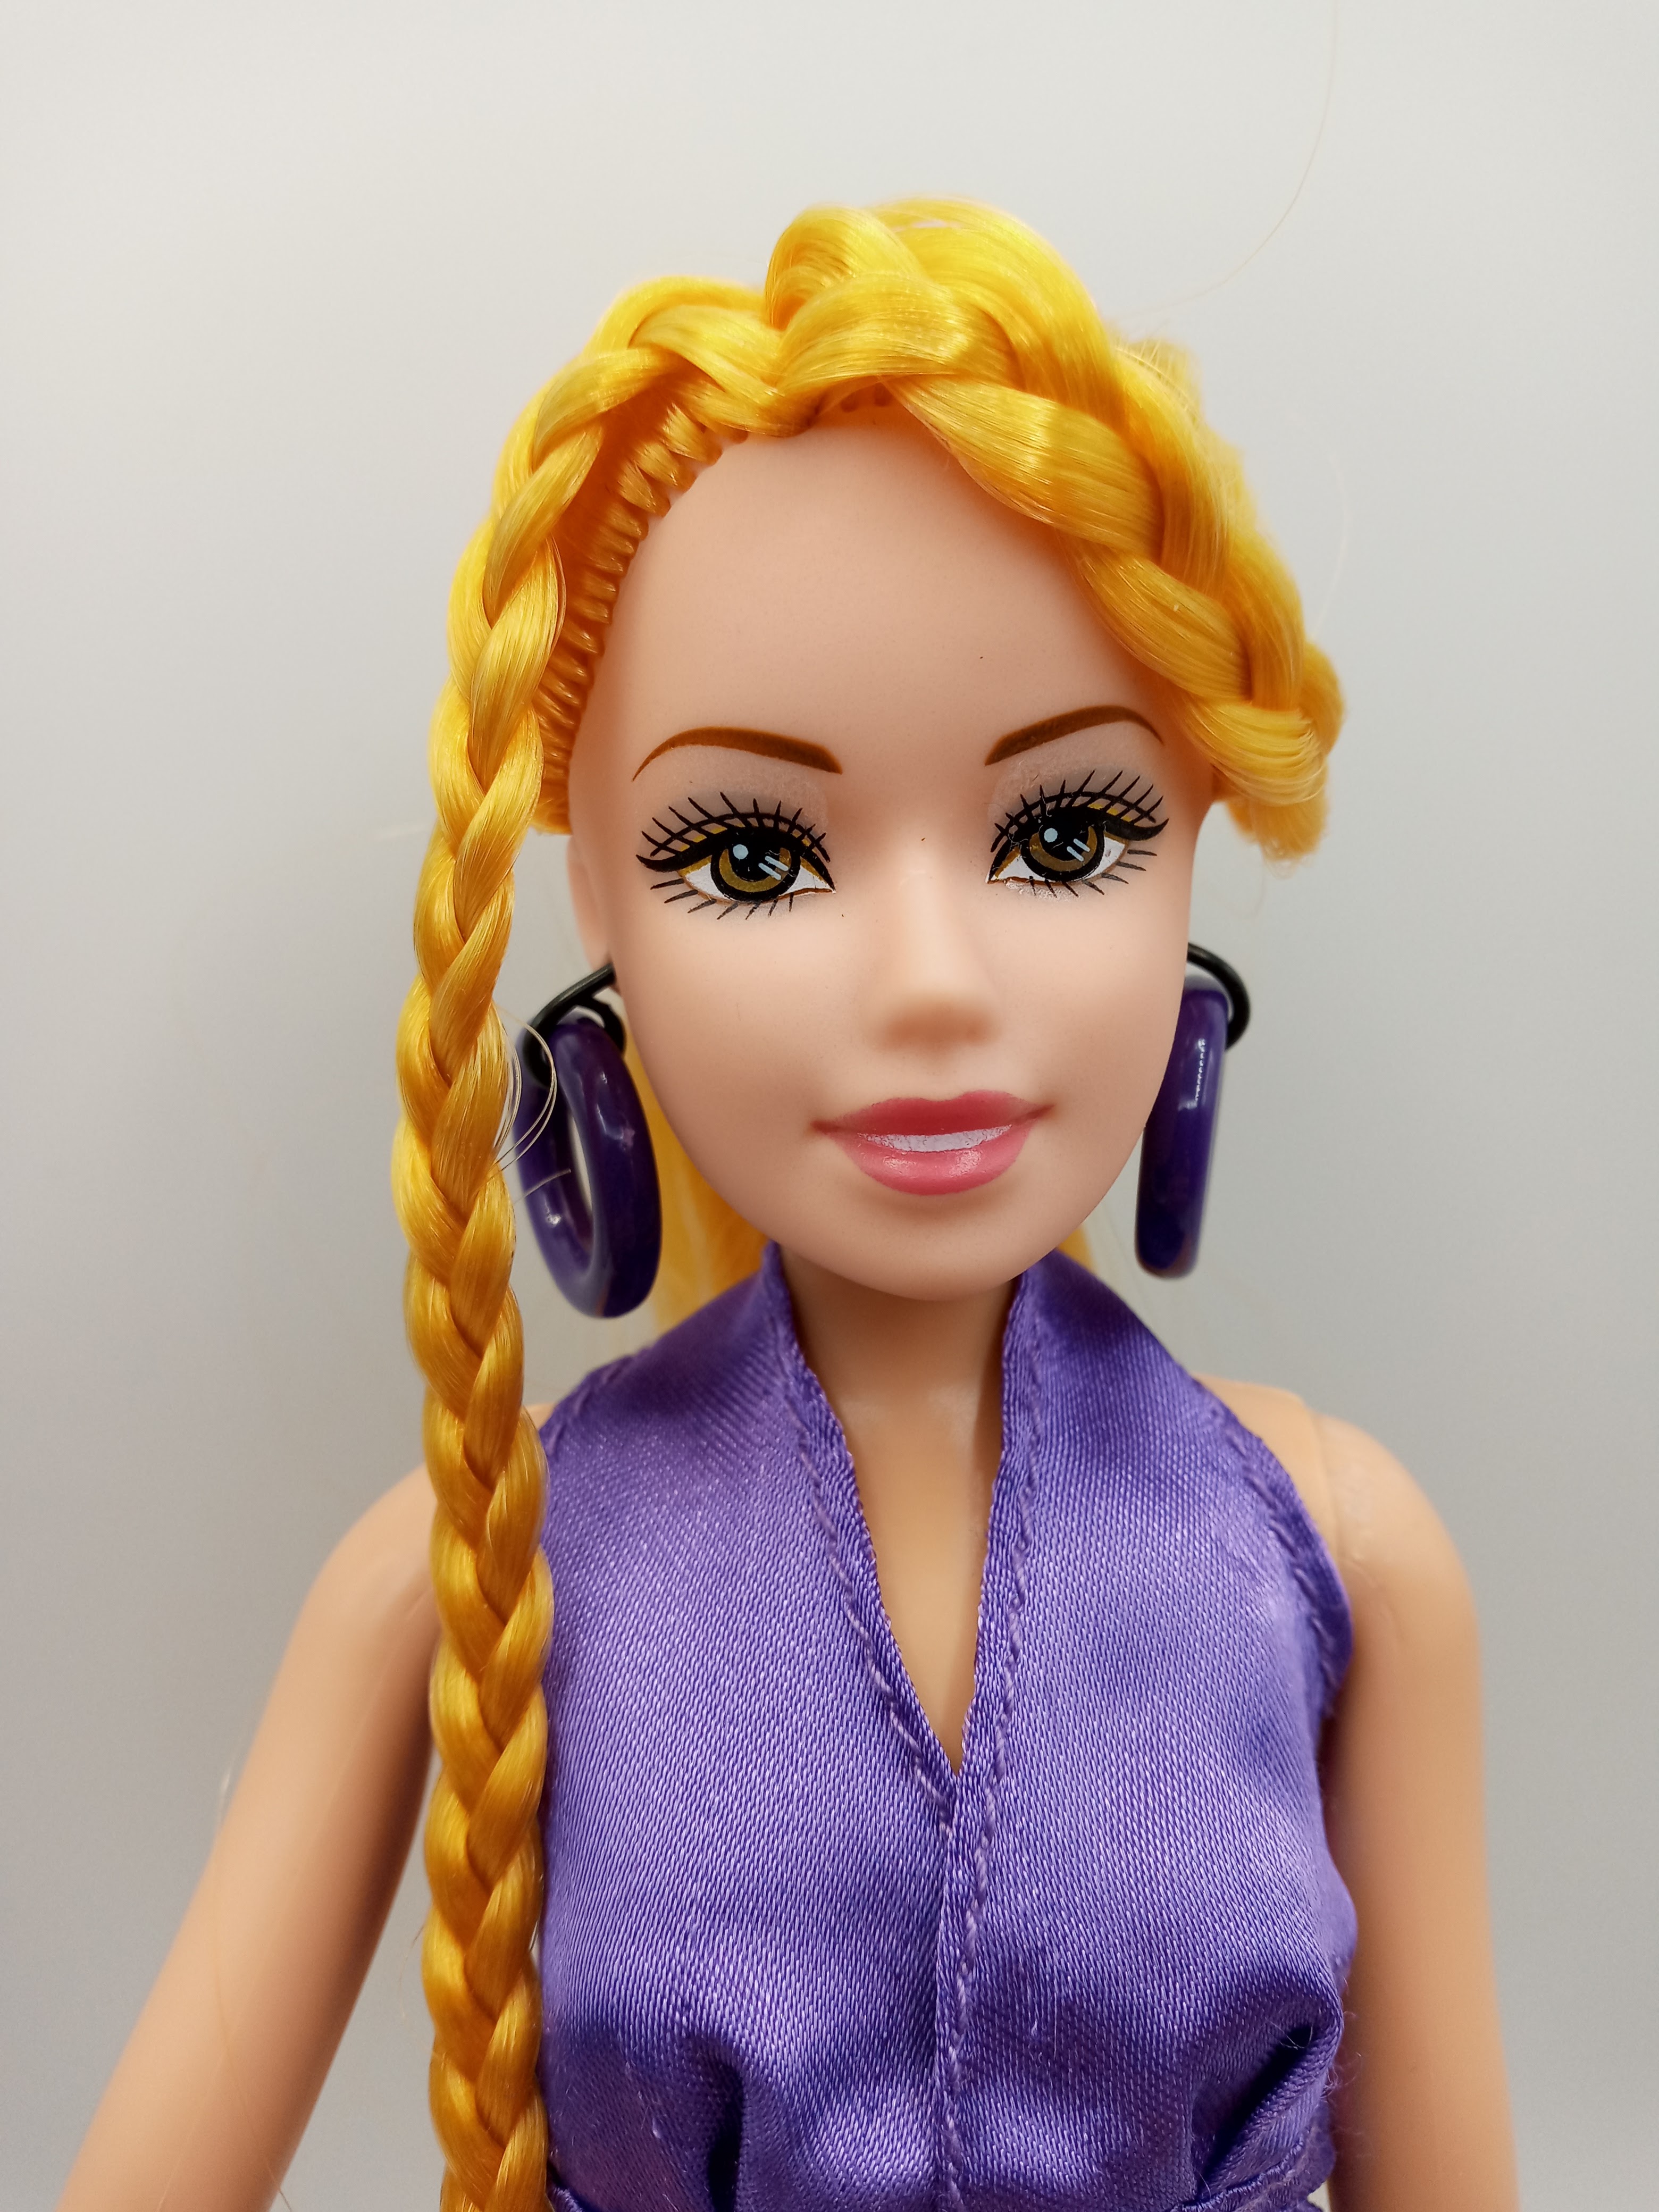
I love that the doll comes with holes for earrings-ack!!! I did have to poke the holes all the way through with a straight pin, but that worked fine. I'll... er... I mean girls will have a blast creating Barbie Bling Earrings from beads and simple jewelry findings. In addition to a cute dress the doll came with pretty pink shoes, so overall, I think this was a fun $1 purchase.

I found a pack of deep purple assorted beads at Walmart for 98¢. In addition to the great color, I don't recall ever seeing round hoops in the packs before, they especially caught my eye. They made perfect little earrings that can be dressed up, or would add some colorful fun to a casual outfit:@)

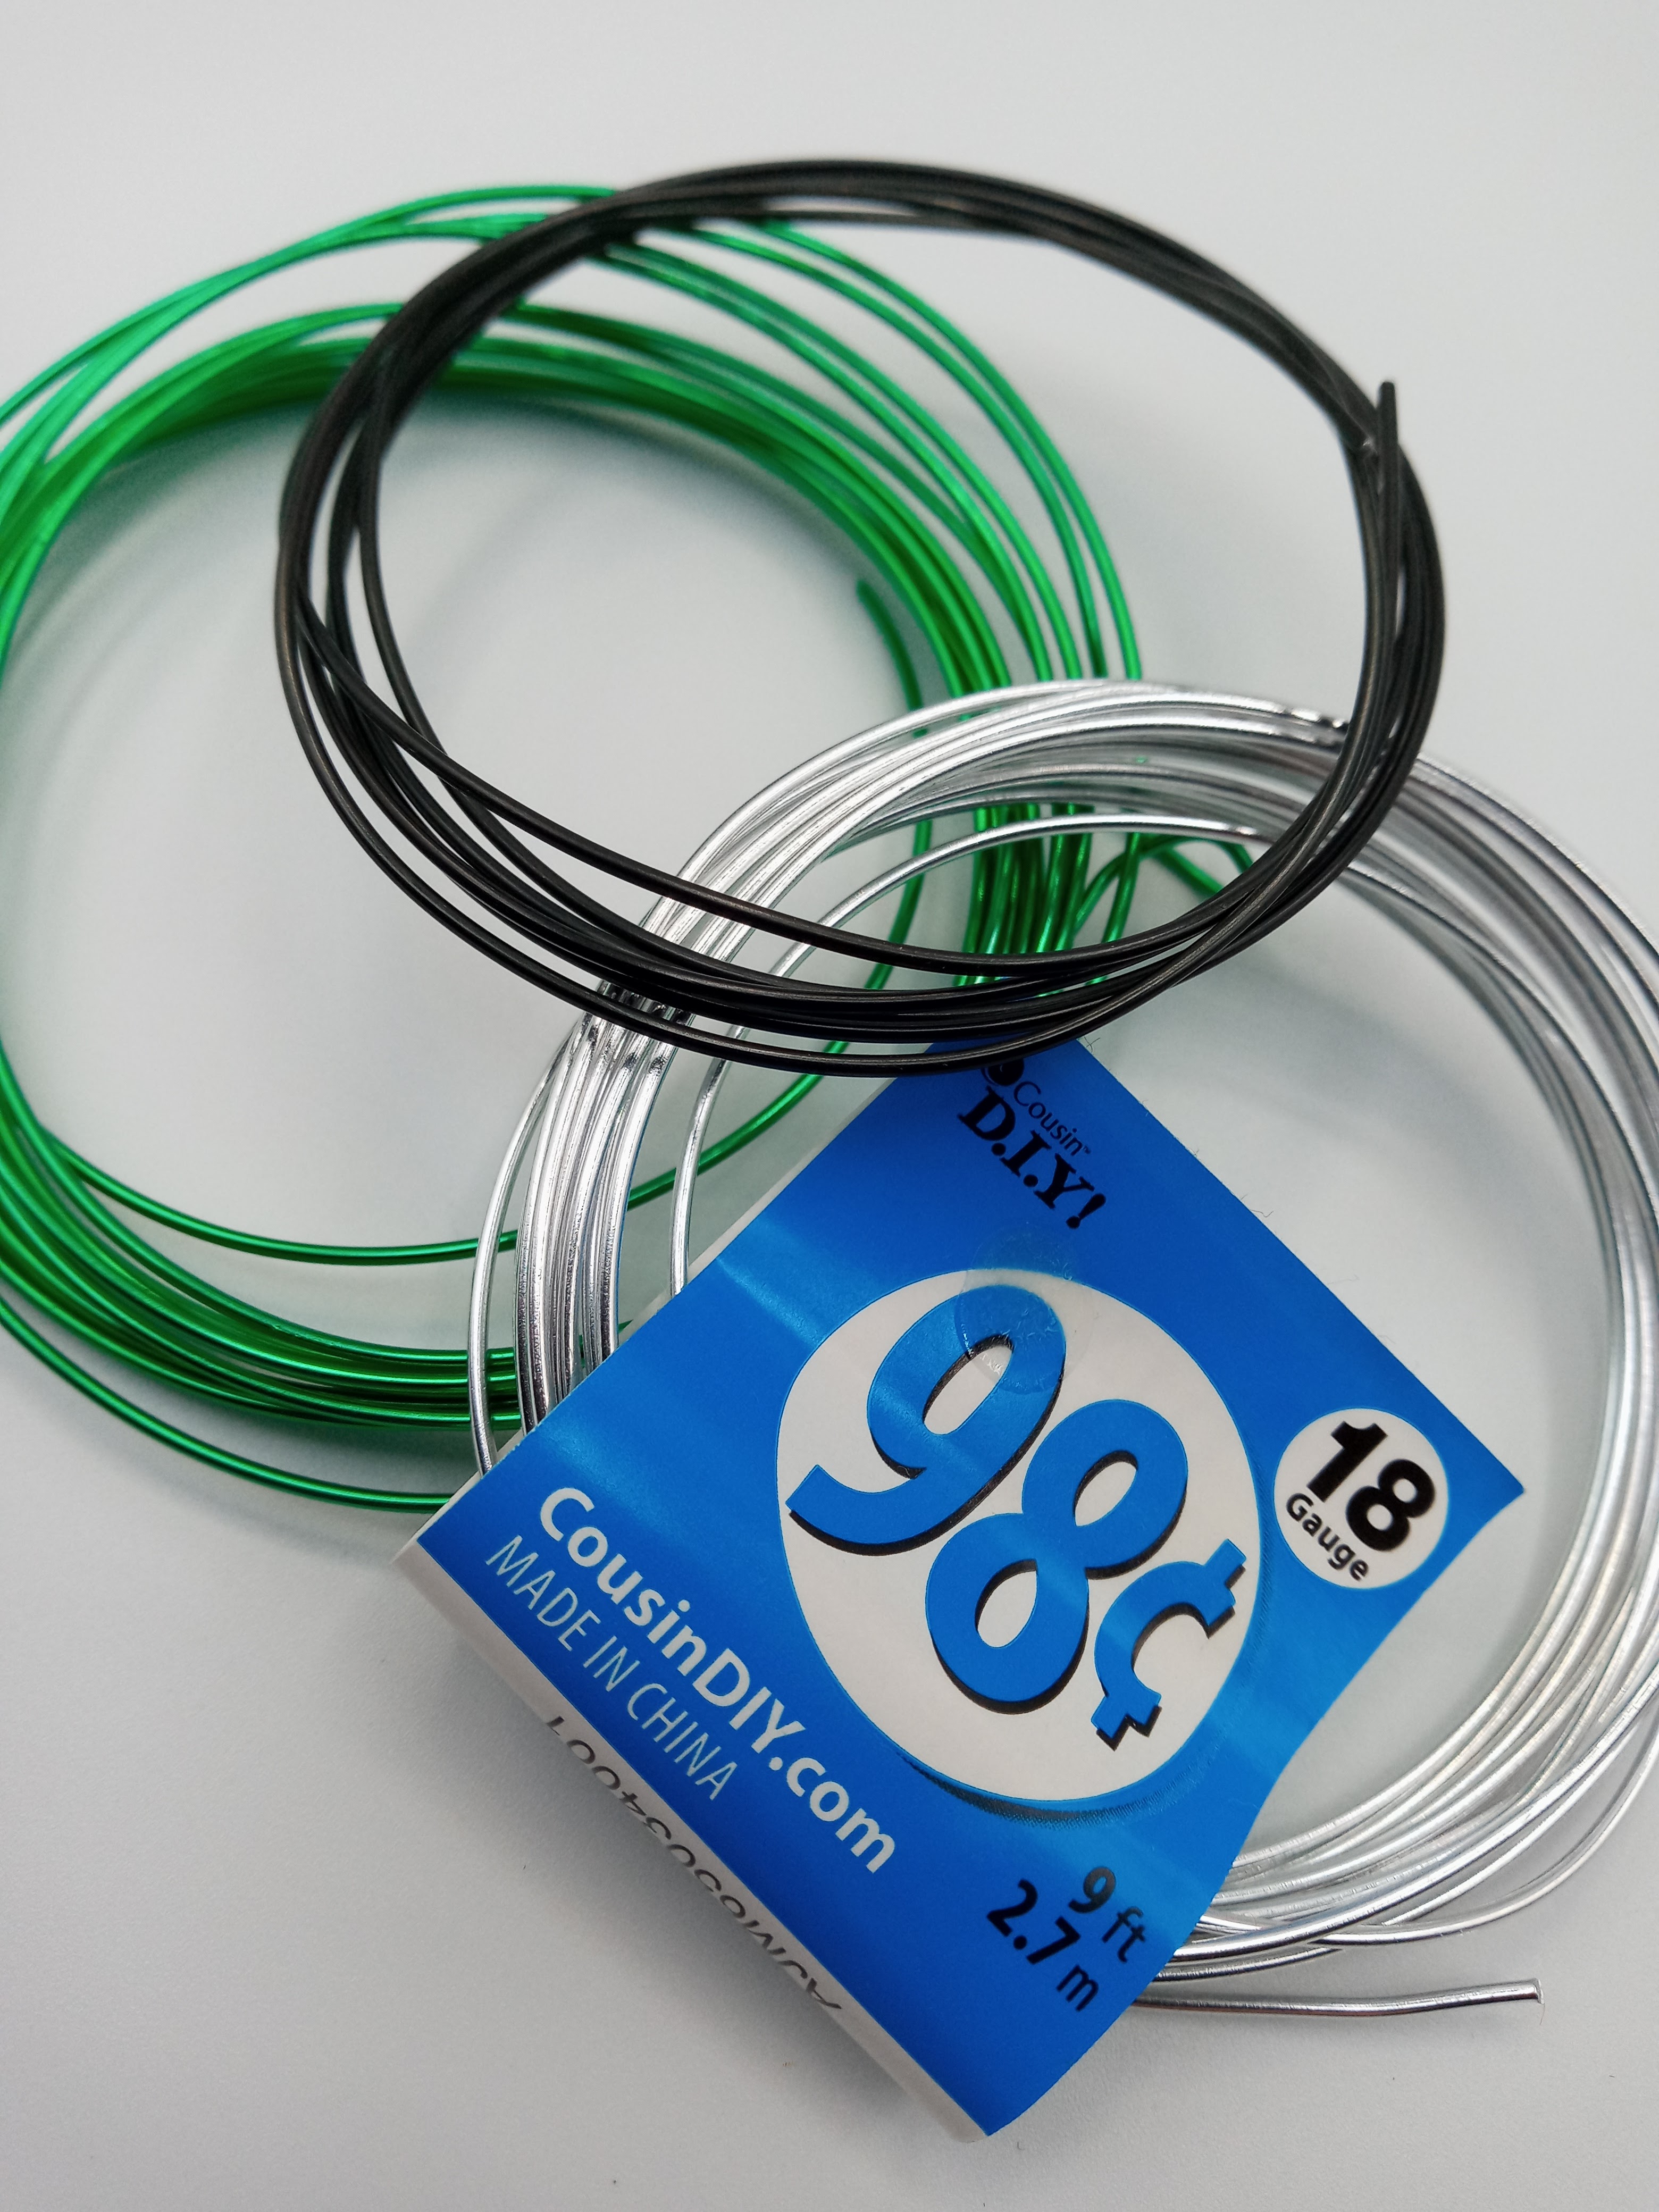
There really isn't any secret to making earrings for Barbie dolls folks, you can start with a straight eye pin specifically made for jewelry, or bend a small loop into the end of wire as I did here. Then you use the straight part of the wire to insert into Barbie's ear hole. Don't worry, it doesn't hurt her a bit😉 

The nice part about making your own wire loops is, craft wire comes in all sorts of colors, and can be found at Walmart, Dollar Tree or craft stores. 

Now I've mentioned before, my dolls are total Diva's, and only pose for pictures... For more rigorous doll play, you may want to bend the wire almost 90 degrees to help hold the earrings in place. And trust me, once you make your first pair of earrings you'll understand what I mean.

My inspiration:

The earrings can be a simple round bead or pearl too:

~Make something just for fun and have a happy day!

I planted some salad greens this spring and have enjoyed cutting off a few leaves for lunch every so often. This pic is from when I first planted it. An unexpected bonus, that's a parsley plant hiding on the left... I'll truly be tickled if that grows for me:@)

In this year where the early holidays were all bunched together, I kept the Easter tree extremely simple. The good thing about fiber optic trees is they put on a light show and have lots of movement. The colors also work well for Easter:@)

And lastly, I wanted to share the beautiful violas Ma gifted me-thanks Ma! 

Happy Easter Everyone-I wish you all a glorious day!