Showing posts with label retro. Show all posts

Monday, February 17, 2025

8x8 Tuna Noodle Casserole -Retro, Budget Friendly

On today's episode of Frugal Living, pinch that penny til it squeals...

It's been about 100 years since I've made a Tuna Noodle Casserole. I thought I'd share it because, it's honestly not a very expensive meal to make, and feels like comfort food on these cold winter days. This recipe for an 8x8 baker will easily feed up to four people. Wiggle room? I used one can of tuna, add more if desired. Want to add carrots or another veggie? Change it up and toss them into the water while boiling the noodles. No noodles? Sub any pasta. Don't care for celery soup? Use Cream of Chicken or Mushroom. Bread crumb topping kinda boring? Change it to crushed potato chips, crushed pork rinds, French fried onions, croutons or panko. Yep, lots of options folks...
Only want two servings: 
Use a pouch of tuna, cut recipe in half, and use a loaf pan.

Walmart the day I shopped:
Can of tuna - 88¢
Can of celery soup - 69¢
Frozen peas - 99¢, use half or more
16 oz dry noodles - $1.45, use less than half

8X8 Tuna Noodle Casserole
5oz can tuna fish in water, drained
approx 5-6 oz wide noodles, cooked and drained
approx half bag of frozen peas (can add more), thawed
10 oz can Cream of Celery Soup
1 Tblsp milk
1/4 tsp seasoned salt, your favorite
1/4 tsp onion powder
Few hearty grinds black pepper
Bread crumbs for top
  1. Boil water, cook noodles for 7 minutes, drain. (I like to add the frozen peas to the colander, then pour the boiling noodles into the colander).
  2. Mix everything except breadcrumbs. 
  3. Pour into 8x8 baking dish (or foil pan, even better:@)
  4. Top with breadcrumbs.
  5. Bake at 350 for 30 minutes or until heated through.
Eat well and Have a Happy Day:@)

Wednesday, June 5, 2024

Mini Corn Dog Bites -Jiffy Corn Muffin Mix

Absolutely nothing new here folks, just a reminder that these Retro Corn Dog Bites are extra fun in the summer and every time I see them I think... If we're calling them Corn Dogs, shouldn't they have a stick? So I added a colorful food pick, but the picks are pretty much just for looks. One bite and the cornbread kinda fell off. This is super easy if we use a Jiffy Corn Muffin Mix, and I love using a mini muffin pan, it gives a nice size hot dog bite. Simply set out some dipping sauce, add some sliced watermelon, eat outside in the sunshine, and lunch is served... Then just hose the kids down, and it will be a fun summer afternoon:@) 

Thoughts: What's the best dipping sauce for this? Honey Mustard (3 ingredient recipe here). Making these for adults, or to watch a game? Maybe add a little cheese and dice up some jalapeno, just sayin'... Color coordinating the sticks for team colors (got my Phillies and Eagles here:@), the holidays, or any occasion, is always fun too. Short on time? Jiffy Mix, hot dogs and food picks can all be found at most Dollar Tree stores, run in and out-done.
I'm guessing one Jiffy Mix would make -at least- 36 bites, and probably more. It depends upon the size of your pan.

Corn Dog Bites
Jiffy Corn Muffin Mix, plus called for items on box
Hot dogs, cut into 6 pieces
Food picks
Ketchup, mustard, honey mustard, BBQ sauce, etc, for dipping
  1. Make corn muffin mix per box instructions.
  2. Spray mini muffin pan well. Spoon mix half way up muffins cups.
  3. Add hot dog piece to center of each one, push down into mix.
  4. Bake at 400 degrees 10-12 minutes, or until muffins are set.
  5. Remove from oven, pop corn dogs out, add stick if desired, and serve.
Have a Happy Day:@)

Monday, May 6, 2024

Apple and Marshmallow Salad

I love it when I see something a little different and realize I already have everything on-hand to make it:@) That was the case with this Apple and Marshmallow Salad. This is cool and creamy, and what I like best is, it calls for mayonnaise, so no need to run to the store for pudding or Cool Whip. I also feel that the mayo tames the sweetness a bit, and makes it a little more of a side dish as opposed to a dessert. But, you can honestly call it either/or, or both. One son would eat it with dinner, one after dinner. Good stuff folks, and easily cut in half for a smaller batch. My apple was a little sad so I peeled it, the pretty red would add some nice color.

Other sweet apple salads:

Apple and Marshmallow Salad-from Taste of Home
3 C apple, 1/2" diced-peeled or not, your call
2 Tblsp fresh lemon juice
1 C celery, sliced
1 C miniature marshmallows
2/3 C mayonnaise-original calls for fat free, I used regular
1/2 C pecans or walnuts, toasted is best
  1. Mix apples and lemon juice in large bowl.
  2. Mix in everything else except nuts, store covered in refrigerator until ready to serve.
  3. Mix in nuts and serve.
Eat well and Have a Happy Day:@)

Monday, April 22, 2024

Two Ingredient Sugar Free Jello Fluff or Whips -Retro Recipe

This Sugar Free Jello Fluff or Whips Recipe has been around forever and was on my to-try list for a long time. As we're looking forward to warmer weather (hello...  Mother Nature???) I thought it was time to whip some up. This is a light and creamy dessert or snack, and honestly, a pretty one too:@) I like the foamy fluffy tops. Choose any flavor of sugar free Jello, and maybe even a make a couple colors for a Mother's Day Brunch. The only other ingredient we need is non-fat plain Greek yogurt, it will add a little tang. This is a diabetic friendly, low carb, low Weight Watchers points, treat. Ma tried this with me and we both give it a thumbs up. Don't hesitate to give it a try folks, I think it will appeal to most. 
A great way to use up that last yogurt that may be flirting with the expiration date:@)

Sugar Free Jello Fluff or Whips
Four serving size sugar free Jello, any flavor
3/4 C boiling water
1 C ice water, add ice, fill to equal 1 C
8 oz yogurt
  1. Dissolve Jello in boiling water. 
  2. Add ice water to Jello, stir.
  3. Add yogurt and Jello to blender, blend on high for 30 seconds.
  4. Pour into glasses or bowl. Makes 4 servings.
Eat Well and Have a Happy Day:@)

Monday, February 5, 2024

Old Fashioned Ham Salad -Dip or Sandwich Spread -Retro Recipe

Still have a little leftover ham in the freezer to use up? This Old Fashioned Ham Salad is the kind of thing my G-Mom-B would make. She had a hand cranked meat grinder and wasn't afraid to use it:@) Today we would use a food processor or knife. Grandmom would definitely use this as a sandwich spread, in my world it's more of a dip... The only thing I left out was the hard boiled egg. In my view, that would only be added if she was low on meat, or needed to stretch it to feed more people. Also, I seriously doubt Grandmom ever had Dijon mustard... She'd just use yellow. This is a very tasty recipe that will most likely appeal to anyone that doesn't mind "crunchy things" in their salads. Recipe easily scaled down.

And of course, this is ~your~ salad...
Want to add onion? Great.
Want to add dill weed? Great.
Anything goes...
Don't hesitate to give it a try folks, 
I called this lunch one fine Saturday afternoon:@)

Old Fashioned Ham Salad-from Retro Recipes
1 lb fully cooked ham, chunky grind or small dice
1 rib celery, rough chopped
2 hard boiled eggs, peeled and chopped
1 Tblsp sweet pickles, chopped
1 Tblsp sweet pickle relish, or to taste
3/4 C mayonnaise
2 tsp Dijon mustard
1/2 tsp black pepper
Bread, crackers, bagel chips, and/or celery and bell peppers for dipping
~~Mix everything through black pepper, serve as desired.

Let's repurpose those leftovers and
Have a Happy Day:@)

Saturday, September 30, 2023

Pumpkin Yeast Dinner Rolls & Fall Football Table Runner with Tiered Tray Tip

Looking for a nice weekend baking project as the weather turns cooler? Or maybe want to perfect that signature side dish before the holidays get here? How about some Homemade 90 Minute Pumpkin Dinner Rolls. The key to these fluffy warm rolls is using rapid rise yeast, also known as bread machine yeast. I dressed mine up a bit with sesame seeds, little pepitas would be a pretty seasonal addition too. Just look at that great color folks:@) Leftover pumpkin? More Pig In Mud ideas here.

And I wanted to share my new Fall Football Table Runner:@) Love the look with my tiered tray on the kitchen table. I've mentioned before, this tiered tray has to be functional (S&P, napkins, candy, food picks, etc...), and I like to add little seasonal touches. My tip for today, you can easily decorate a tier with nothing more than a candle ring. This one is nice and full. I'm a sucker for these retro hard plastic rings and pick them up when I find them in good shape at thrift stores.

Pic from Amazon:
The footballs are 4" long.

🍁Happy early fall,
have a great weekend:@)

Monday, August 28, 2023

Slow Cooker Chicken with Mushroom Soup Gravy-Easy Retro Comfort Food

As summer winds down I find myself craving good, old fashioned, stick to the ribs, comfort food... Mainly, gravy and mashed potatoes:@) It was a Saturday and I also wanted to smell something good cooking for hours... So I tossed this simple Chicken with Mushroom Soup Gravy into the Crock Pot and patiently waited until dinner. My chicken was frozen, I used one large breast, and a two quart slow cooker. This will make two hearty meals, or 3-4 if you stretch it more into a type of stew with lots of vegetables. Liners help make clean-up a breeze, and can even ~occasionally~ be found at Dollar Tree. Sorta white for pictures... Chicken and mashed potatoes. But I will say, it didn't last long on the plate.

Nice thick gravy:
You know you want some... :@)

Chicken with Mushroom Soup Gravy-Slow Cooker
One large or two smaller boneless skinless chicken breasts-mine was frozen
1/4 tsp seasoned salt-I used Lawry's original
1/4 tsp garlic powder
1/4 tsp onion powder
1/4 tsp dry thyme
few grinds black pepper
10 oz can cream of mushroom soup, undiluted
chives or parsley for garnish-optional
  1. Add chicken to vessel, I used a slow cooker liner.
  2. Sprinkle spices over top of the chicken.
  3. Pour soup over chicken. No other liquid required.
  4. Add lid, turn to low, cook for approximately 4 hours or until chicken is done. Will cook in less time if using thawed chicken, the beauty of this is that you don't need to plan ahead, 4 hours-ish from frozen. **Please note all Slow Cookers run at different temperatures, times will vary.
  5. Serve with mashed potatoes, or starch and veggies of your choice.
Eat well and have a happy day:@)

Wednesday, May 31, 2023

Fizzy Retro Lime Jello & Cucumber Salad

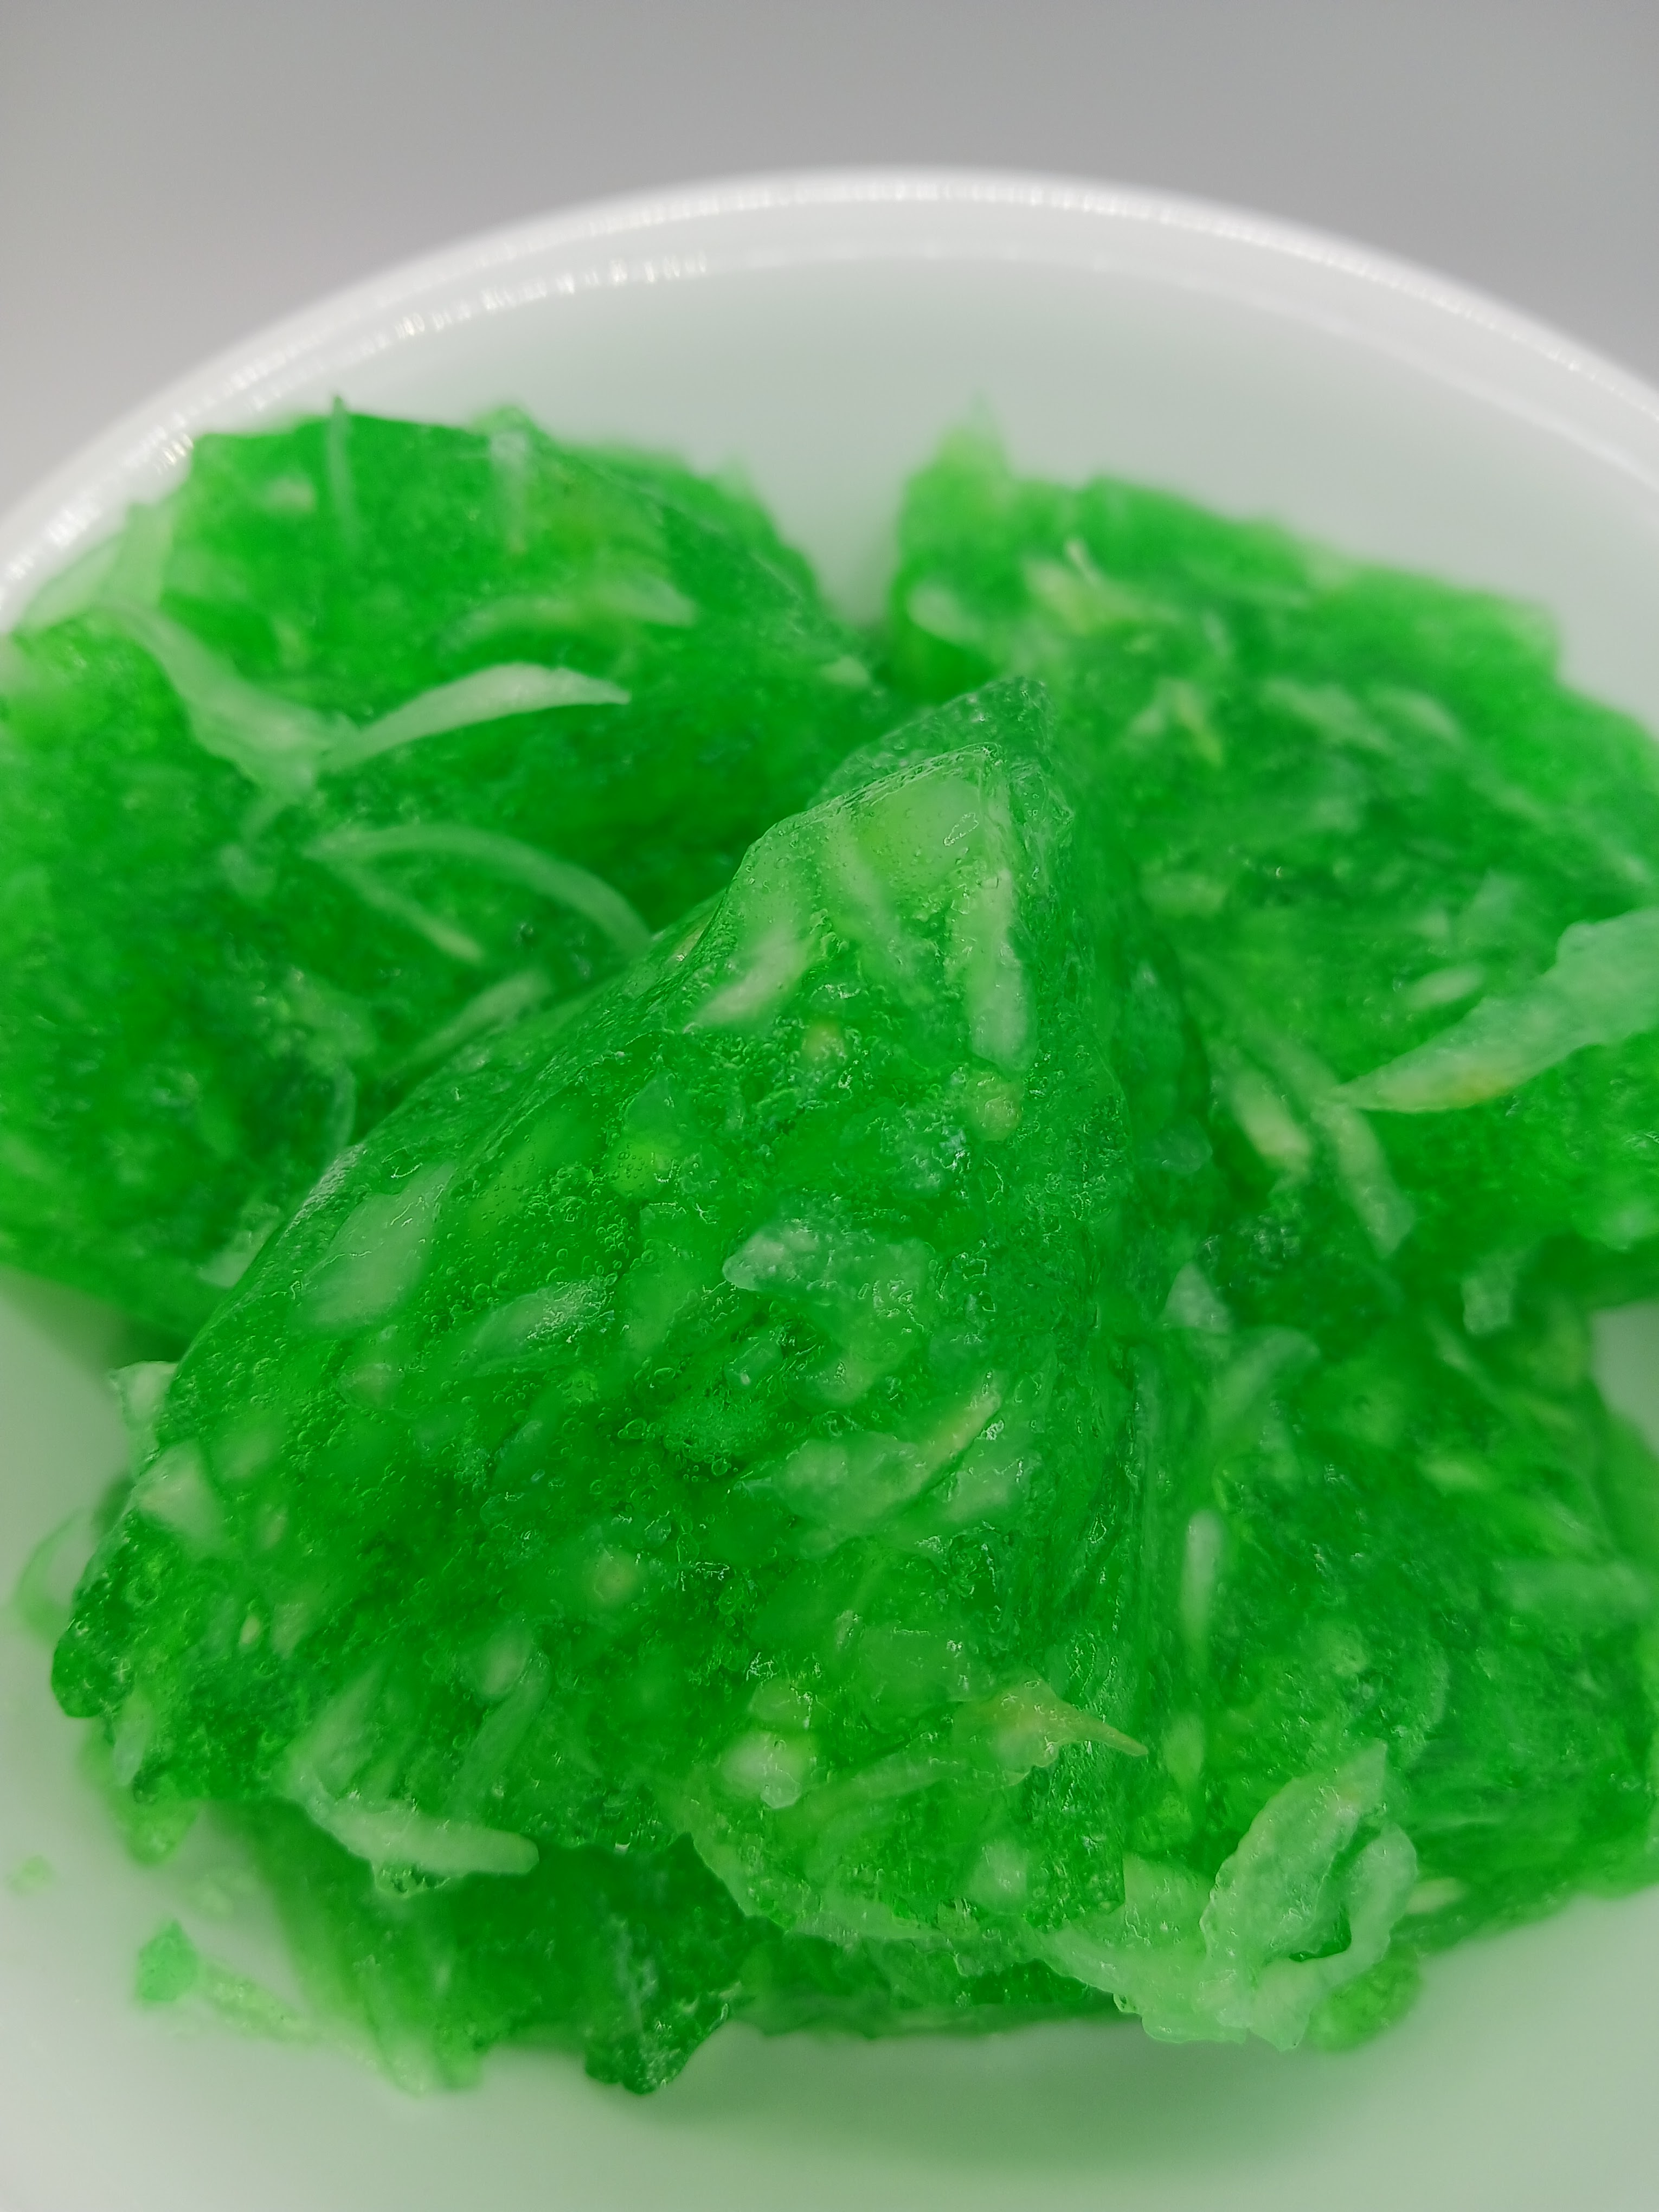
I have to tell ya folks, when it comes to these old school Jello side dishes it doesn't get more cooling and refreshing than this Sparkling Lime Jello and Cucumber Salad. Perfect for summer:@) The cucumber helps tame the tangy lime, and this is something most people will like. We felt this one is also more suited as a side dish as opposed to dessert. My twist... Have you seen the new packs of Sparkling Jello at Walmart? They are intended to be made with the Aha brand of water, I just used Great Value Key Lime Sparkling Water. But I'm sure this would be great with the lime/watermelon flavored water. I made one box of the recipe in my 2 1/2 C thrift store mold. Two boxes can be simply poured into a loaf pan if you don't have Jello molds. Or just scoop it out of a bowl... The idea is just to try it!

I like that you can see some of the bubbles in this pic:@)
Not a big fan of lime Jello?
Use lemon instead.
I don't have too many green Jello posts...
So, yea, lime it was:@)

Sparkling Jello comes in three flavors,
and is sugar free:
Good ole regular Lime Jello would work fine too:@)
Best eaten the day it's made.

Sparkling Lime Jello and Cucumber Salad-inspired from Kraft
For each 4 serving size Sparkling Jello:
1/2 C boiling water
1 1/4 C sparkling water-I used key lime, can use lime/watermelon
1/2 large cucumber, peeled, seeded, and shred
  1. Dissolve Jello in boiling water.
  2. Stir in 1 1/4 C cold sparkling water. Refrigerate for about 30-45 minutes, or until slightly thickened. You may notice a lighter colored coating on top, I suggest scooping that off before stirring the Jello.
  3. Stir cucumber into Jello. *Tip: I shred my cucumber onto a couple paper towels to let a little of the extra liquid drain off.
  4. Pour into a mold or bowl sprayed with vegetable spray.
  5. Refrigerate at least 4 hours, or until set. Unmold and serve.
  6. *Note: If using Sparking water, it's best to make this the day you're serving it so the water stays fizzy and bubbly.
Try something new and have a happy day:@)

Wednesday, April 5, 2023

Marinated Italian Olives

Did you know, back in the day, that the center section of the deviled egg dish was intended to hold pickles and/or olives? Yep. How about filling it with some colorful and very robustly flavored Marinated Italian Olives. I really did enjoy these olives folks, and do recommend giving them a try.  And as you can see, I even cut the celery into larger pieces, intending for that to be a bite size treat too:@) Have some roasted red peppers? Toss them in, I think they would add some nice color too.


Marinated Italian Olives-from Taste of Home
14 oz-ish can black olives, drained
7 oz-ish jar green olives with pimento, drained
large stalk celery, sliced into bite size pieces -or- 2 Tblsp finely chopped celery
2 Tblsp finely chopped onion
2 Tblsp capers-I didn't have these
1/4 C olive oil
2 Tblsp red wine vinegar
2 cloves garlic, minced
1 tsp dried basil
1 tsp dried oregano
1 tsp crushed red pepper flakes-can cut back, you know your crowd
salt to taste if desired-I didn't add any extra
~Mix everything, let mingle in refrigerator for at least 3 hours, stir and serve.

Eat well and have a happy day:@)

Wednesday, March 29, 2023

Old Fashioned Macaroni & Tomatoes

I am truly drawn to old time, tried and true family recipes. And if it's super easy, and from someone's Grandma, well, that's even better:@) Immediately copied this Old Fashioned Macaroni and Tomatoes recipe and couldn't wait to try it. The original post also calls it Southern Mac & Tomatoes, and it was copied from a cookbook where it was labeled Grandma's Macaroni and Tomatoes. So the idea has been around for a while, and it's versatile. I can see this as an inexpensive kid friendly meal that will feed quite a few people. Also as an easy side dish, maybe with a quick pan fried, or grilled ham steak. Another option, add a handful of green beans to the pasta as it boils. Did I mention it's versatile???
I also love that, much like Grandmom,
canned tomatoes and dry macaroni are pantry ingredients for me:@)
Recipe easily cut in half.

Old Fashioned Macaroni and Tomatoes-from These Old Cookbooks
2 C dry macaroni, cooked and drained
28 oz canned tomatoes with juices, whole or diced
3 Tblsp sugar
1/2 tsp salt -or- S&P to taste
2-3 Tblsp butter
  1. Add tomatoes to large skillet, break up if using whole tomatoes.
  2. Add pasta, sugar and S&P, bring to a simmer.
  3. Add butter, stir-done.
  4. Serve with bread and butter, and maybe a side salad.
Eat well and have a happy day:@)

Monday, March 6, 2023

Raisin Bran Muffins

I had some cereal to use up and decided to turn it into these Raisin Bran Muffins. My recipe below is a variation of the vintage recipe on the side of the box. I eliminated the shortening and cut back a little on the fat by substituting some apple sauce. Also bumped up the flavor with some cinnamon. My best suggestion, add more raisins and maybe a handful of nuts, that would make them even better:@) These muffins do freeze well.
A tip I read from seasoned bakers:
Let the cereal begin to soften in the milk before adding everything else.

Raisin Bran Muffins-adapted from Kellogg's
2 C Raisin Bran Cereal
3/4 C milk
1 egg, beaten
2 Tblsp butter, melted
2 Tblsp applesauce
1 C flour, any combination of A/P and whole wheat-I used half/half
2 1/2 tsp baking powder
pinch of salt
1/4 C sugar
1/2 tsp cinnamon
  1. Add cereal and milk to large bowl, stir and let sit while gathering everything else.
  2. Mix everything until just combined.
  3. Fill paper lined or well sprayed muffin pan 2/3 full with batter.
  4. Bake at 400 degrees for 25 minutes or until muffins are set.
  5. Serve warm.
Enjoy a healthier snack and have a happy day:@)

Wednesday, December 7, 2022

Copper Pennies -Carrot Salad -Retro Recipe

I've wanted to try these Copper Pennies for a long time and they turned out to be a nice, puckery, side dish. If you like pickled veggies, or pickled vegetable salads, you'll like this one folks:@) The recipe calls for fresh carrots, peeled and cooked. You can easily substitute canned carrots, two cans, and I think there's plenty of sauce for three cans. I did choose to cut back quite a bit on the vegetable oil. If using canned carrots be sure to drain them well.

Copper Pennies-from Paula Deen
1 C sugar
1 C white vinegar
1 C vegetable oil
1 tsp dry mustard
1 tsp worcestershire sauce
S&P to taste
10 oz can tomato soup
2 lbs peeled, sliced and cooked carrots
1 medium onion, sliced
1 medium green pepper, sliced
  1. Add sugar, vinegar, oil, mustard, worcestershire and S&P to pan. Bring to a boil, stir until sugar dissolves.
  2. Remove from heat, stir in soup.
  3. Add carrots, onion and peppers, mix well.
  4. Cover and store in refrigerator, let mingle overnight is best.
Eat well and have a happy day:@)

Monday, July 18, 2022

Easy Cheddar Potato Cakes from Dry Potatoes

G-Mom-B knew how to be frugal. Yep, she could use up any leftover, or food that was just about at the end of it's usefulness... Fruit crumb cake was a favorite:@) While today's recipe isn't quite a -use it up- idea, I'm brought back to G-Mom's potato cakes from leftover mashed potatoes, good stuff folks. With the world as it is today, it's not a bad idea to have some items in the pantry that have a long shelf life. Instant mashed potatoes are one suggestion. I had some, and decided to make Easy Cheddar Potato Cakes from Dry Potatoes. Love the addition of corn meal, it adds some texture and bite. I think Grandmom would approve...
Recipe easily cut in half, just scramble what's left of the egg and cook it in the pan too. As a point of reference: A 4oz package of dry mashed potatoes = about 1 1/2 C.

As an experiment I cooked some, put the leftover batter in the fridge to get nice and cold, formed the balls and froze them.
Then simply thawed them for about 30 minutes and fried as normal. Although I used olive oil this time-yum. Worked just fine:@)

We did use some leftover mashed potatoes for these

Easy Cheddar Potato Cakes-from Food.com
2 C dry potato flakes
1 C shredded cheddar cheese
2 Tblsp flour
1/4 C corn meal
1-2 tsp seasoned salt
1 tsp garlic powder
2 green onion, sliced
1/4 tsp cayenne, optional
1/2 tsp black pepper, or to taste
2 C milk
1 egg
1/4 C butter, melted
vegetable oil for frying-I prefer olive oil, or bacon fat would be great...
  1. Add everything through black pepper to bowl.
  2. Mix milk, egg and butter well.
  3. Stir wet into dry, mix well. Let sit for at least 10 minutes or until well absorbed.
  4. Heat skillet to medium (a non-stick pan works well). Add oil.
  5. Using slightly wet hands, form mixture into 2 Tblsp balls, place in skillet, press down with back of spoon.
  6. Cook about 3 minutes each side, or until lightly browned, adding more oil as needed. Remove to paper towel.
Eat well and have a happy day:@)

Saturday, July 2, 2022

Skillet Summer Squash with Bacon & Raised Bed Garden Update

I'm pleased to report that my zucchini and crookneck squash have been very happy in the new raised bed garden this year. I've been picking enough to share, and that makes ~me~ very happy too! What to do with all that goodness that Mother Nature is gifting? Well, I'm always looking for more ideas to add to my Zucchini Pinterest Board, so I decided to keep things super simple and make some Skillet Summer Squash with Bacon. I'm making it on the stove so everyone can try it, but it would also work in a disposable foil pan on the grill. Three ingredients, squash, bacon and onion... And the kids might just find that they like squash after all, might just:@)

Let's talk about summer squash for a minute...
I ~love~ zucchini, it's meaty, extremely versatile and can be used raw or cooked.
Crookneck squash on the other hand, seems to have very little flesh and lots of seeds.
This also means it gets very soft, very quickly.
A little softer than to my liking...

The squash corner of my garden early morning 6/26/22:
Zukes on left, crookneck on right.
The crookneck, while beautiful
is shading the pepper plants and growing into the cucumbers.

I decided either the plant had to go, 
or I'd experiment with extremely cutting the leaves back.
So it got a heavy trimming,
only the main stem and vertical leaves remain.
We'll see how that affects it, so far, so good.
And yes, next year the squash does get it's own garden bed.

Overall, the garden is still doing very well at this time:@)
I've picked 24 squash so far, and enough string beans for dinner.
6 cucumbers, and they are just getting started.

Skillet Summer Squash with Bacon
All estimates:
1-2 slices bacon for each 6"-ish squash, any combination zucchini and yellow squash
Onion, sliced, as much as you'd like, but I suggest... lots:@)
Squash, washed, dried, ends removed, sliced a ~hearty~ 1/4", half the circles if large
S&P
  1. Cook bacon to your desired doneness (crispy for us), remove to paper towels.
  2. Add onion to bacon fat, cook for a few minutes, until it starts to become translucent.
  3. Add squash to pan, stir to cover in fat. Cook for a few minutes, until it becomes heated through, and to your desired level of doneness. We like to have a little bite, some folks like for it to get completely soft-you know your crowd.
  4. Crumble bacon, add back to pan.
  5. Sprinkle with S&P to taste. 
Eat well and have a happy day:@)

I'm Joining:

Monday, June 6, 2022

Campbell's Easy Baked Beans -Microwave, Oven, Stovetop, Grill or Slow Cooker

If you've been around Pig In Mud for a while, you know I love beans:@) So I'm always looking for new recipes to try, and sometimes I fall upon one that's been around forever like these Campbell's Easy Baked Beans. And not only do they come together ~very~ quickly, they call for fairly standard pantry ingredients-gotta love that. The recipe is literally written up to be heated in the microwave, but anything goes. Oven baked or using a disposable pan on the grill would be great. I added a liner to my casserole crock pot, left the lid ~off~ and cooked for several hours on high. The vessel kept them nice and warm all through dinner. While these beans aren't going to make us toss our favorite recipe, they do have a nice, please the general crowd, type of flavor.
Recipe easily scaled down or up.

Easy Baked Beans-from Campbell's
Two 15 oz cans pork and beans
2 Tblsp brown sugar
2 Tblsp ketchup
1 Tblsp yellow mustard
1 Tblsp Worcestershire sauce
3 Tblsp bacon bits
2 Tblsp dried minced onion flakes, can use 1/4 C small diced onion instead
~Mix everything, thoroughly heat through. Yep, it's that easy folks!

Eat well and have a happy day:@)

Wednesday, May 25, 2022

Fruit Pie Filling Crumble - 8x8 Jiffy Fruit Magic

This Jiffy Fruit Magic is a fun retro recipe that only calls for three ingredients, four if you'd like to add nuts. It whips up quickly and is baked in about 45 minutes. This is where my countertop oven comes in handy during the warmer months... The idea is to use a Jiffy yellow cake mix and a 21 oz can of pie filling, any fruit you'd like. Cherry is always good for the summer holidays, and since almonds go well with cherries, I added a handful of sliced almonds. It's a nice sweet treat that can only be made better with a scoop of vanilla ice cream:@)

Jiffy Fruit Magic
1 box Jiffy yellow cake mix
21 oz pie filling, any fruit
1/4 C butter, softened
Up to 1/2 C chopped nuts, optional
  1. Spread pie filling into 8x8 ungreased pan.
  2. Cut butter into cake mix until crumbly, adding nuts if using.
  3. Sprinkle mixture over pie filling.
  4. Bake at 350 degrees for 45-50 minutes.
Enjoy a sweet treat and have a happy day:@)

Wednesday, April 13, 2022

Turmeric Pickled Eggs

Ok folks, you know what time of the year it is, yep, time for a new picked egg recipe:@) Each year around Easter I try out another pickled egg to help us use up those hard boiled eggs... This year's contribution, Turmeric Pickled Eggs. Just look at that great color! These are great eggs if you're a fan of big, puckery, vinegar flavor. And I do mean ~big~. I turned them into egg salad for lunch, and it was very robust. I made a four egg test batch, using half the brine recipe, and a wide mouth pint jar. The pic below was after marinating for 10 days in the fridge.
More pickled egg ideas can be found HERE.

Turmeric Pickled Eggs -from 101 Cookbooks
1 1/3 C apple cider vinegar
1/2 C water
2 Tblsp sugar
1 tsp fine grain salt
2 tsp ground turmeric
1/2 onion or 4 shallots, thinly sliced-I used yellow onion
1 Tblsp whole peppercorns
6 hard boiled eggs, cooled, peeled, and cut in half
  1. In small sauce pan, bring vinegar, water, sugar, salt and turmeric to a simmer, cook until sugar dissolves. 
  2. In layers, fill quart jar with onion/shallot, peppercorns and eggs. 
  3. Pour liquid into jar, cover and store in fridge. Give a little swirl every once in a while.
  4. Original post says you can begin eating them as soon as you'd like, good for up to 2 weeks in fridge.
Let's use up those eggs the kids dyed,
and have a Happy Easter Weekend🐣

Monday, February 14, 2022

Crowd Size Impossible Taco Pie -Bisquick

Well here's something new, I'm generally scaling recipes down, but this time I wanted to try a 9x13 size Bisquick Impossible Taco Pie. I had some hamburger and needed an idea for Sunday dinner, this turned out to be a real crowd pleaser:@) We all loved adding the fun toppings at the table, use anything your crew likes with tacos. This hearty recipe also calls for four eggs, the boys thought this dish would be great to serve for brunch too.

Leftovers freeze beautifully, simply reheat in microwave.

9x13 Pan Bisquick Impossible Taco Pie-adapted from Betty Crocker
1 lb lean hamburger
1 1/2 C onion, chopped
2 envelopes taco seasoning-very robust flavor, can start with 1 1/2 envelopes, add more to taste
14.5 oz can black beans, rinsed and drained well-can sub 1 C beans, 1 C corn
10 oz tomatoes with chiles (Rotel or store brand) drained well-can use green chiles
1 C Bisquick
2 C milk
4 eggs
2 C cheddar cheese, shredded
Any toppings you like with tacos
  1. Spray glass 9x13 pan with cooking spray (I cooked the hamburger and baked it in a 12" round, straight sided, non-stick pan-worked great!).
  2. Cook hamburger and onion. 
  3. Turn of heat, stir in seasoning, beans, corn if using, and Rotel. Pour into 9x13 pan.
  4. In bowl, whisk Bisquick, milk and eggs. Pour over hamburger mixture.
  5. Bake at 400 degrees for 30 minutes or until knife comes out clean.
  6. Top with cheese, bake 10 minutes more, or until cheese browns up nicely.
  7. Let sit about 5 minutes before slicing into  squares.
  8. Serve with anything you like on tacos: Cheese, sour cream, lettuce, salsa, black olives, avocado, corn chips, tortilla chips, etc.
Enjoy a little comfort food and have a happy day:@)

I'm Joining:

Monday, February 7, 2022

Red Hots Cherry Jello Jigglers -Retro Recipe

I've had this retro Cherry Jello with Red Hots Candy saved for quite a while. The original idea makes a jello mold at Christmas with apple, celery and walnuts. But I thought we'd update it a bit by making jigglers and serving it for Valentine's Day. And if you happen to have a mini heart shaped cookie cutter, well, that's just perfect! What to do with the non-heart pieces? I suggest letting the kids have the hearts and add the leftovers to pretty glasses, serve with whipped cream and call it a parfait, or they make a great treat for the cook:@)
Traditional Jello Jigglers call for 1 C water per 3 oz box of Jello.
If you want to stretch this a little more,
or want to tame the cinnamon flavor a tad,
you can add up to 1/4 C more cold water and still be able to hold the Jello in your fingers.

Red Hot Cherry Jello Jigglers
Four serving size cherry Jello
1 C boiling water, divided
1/4 C Red Hots candy
Up to 1/4 C cold water if desired
  1. Dissolve Jello in 1/2 C hot water.
  2. Dissolve Red Hots in 1/2 C hot water, stir both liquids together and add cold water if using.
  3. Pour into desired mold or bowl (I used my LeCreuset 5" square baking dish) and chill until set, approximately 4 hours, overnight is always best.
  4. Dip bottom of mold in warm water, dry with towel, turn Jello Jigglers out onto plate. Cut as desired.
Enjoy a snack and have a happy day:@)

I'm Joining:

Wednesday, December 8, 2021

Dashing Through the Snow -Christmas Pie Embellishment

While we love desserts of all sorts, there's no doubt about it, apple pie is #1 with the crew here at Pig In Mud. I wanted to mention that it's fun to decorate pies too folks... I've had this retro Santa decoration from Etsy for a few years, and decided to bring it out for this pie. I simply gave the cool top crust a dusting of powdered sugar and, wa-la, we have snow! I think Santa, the reindeer and trees are really sweet and give this dessert just a little extra something-something:@)

Santa says, gotta dash off...
Kinda busy time of year:@)

Make the season magical and have a happy day:@)

I'm Joining: